A failover cluster is a group of two or more computers working together to increase the availability of a clustered services or applications. To make virtual machines highly available in Hyper-V environment, we must implement failover clustering on the Hyper-V host servers. Windows Server 2012 Hyper-V comes with a number of new features and improvements for Hyper-V high availability and virtual machine mobility. In this article, I will walk you through everything we need to do to build Hyper-V failover cluster including how to validate, create, manage and test our high availability VMs via Failover Cluster Manager. In this article, we will build a two-node failover cluster using iSCSI QNAP storage, using three Networks for failover cluster network. Thanks to Sky Nepal Pvt. Ltd. (http://www.skynepal.com.np) for providing servers and QNAP storage for this lab setup.
Prerequisites:
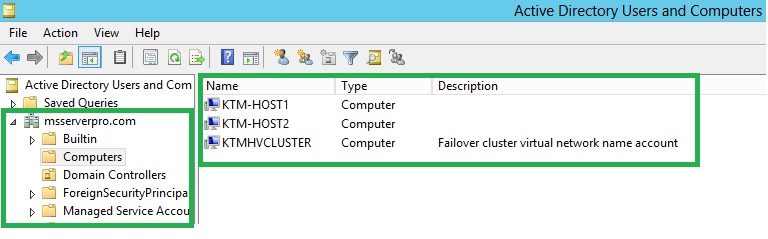
- Make sure both Hyper-V servers are joined to the same Active Directory Domain
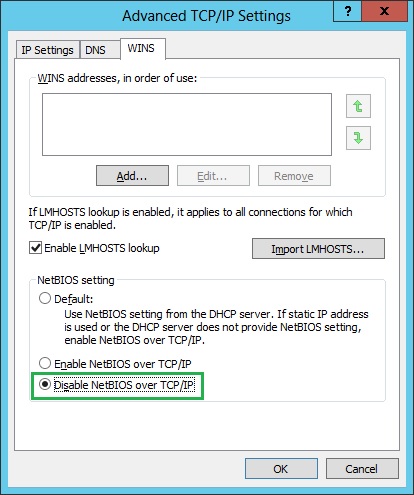
- Configure the Network Card for a Failover Cluster
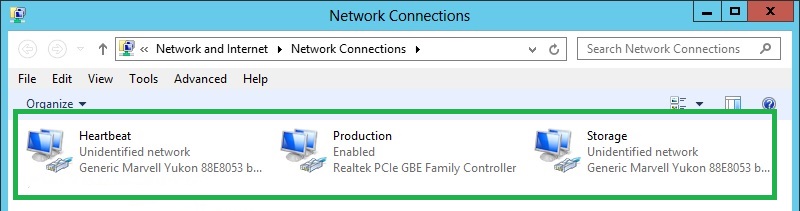
- Rename all the Network Cards
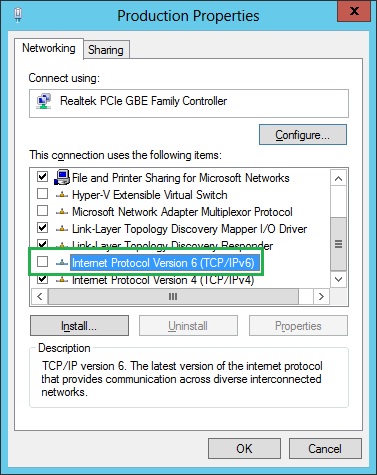
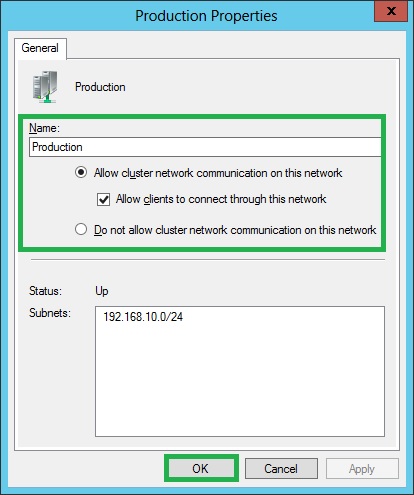
- Configure the Public NetworkHere we have defined Public Network as Production. Deselect any unnecessary protocols or features that will not be used or is not necessary.
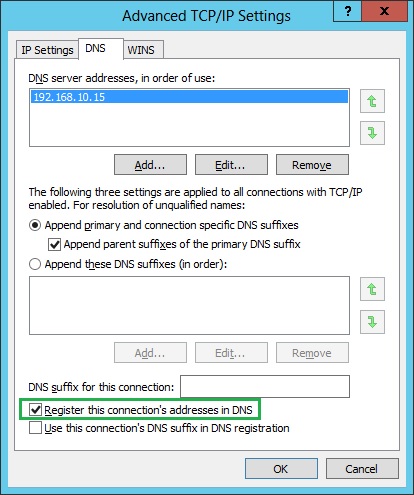
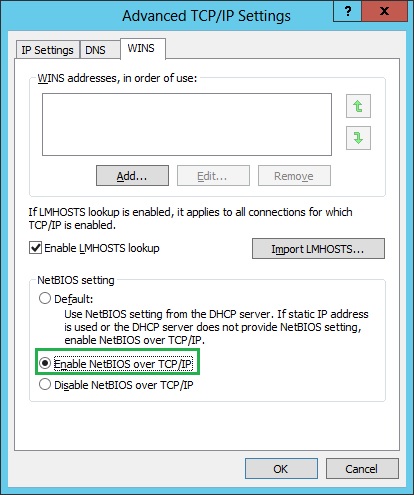
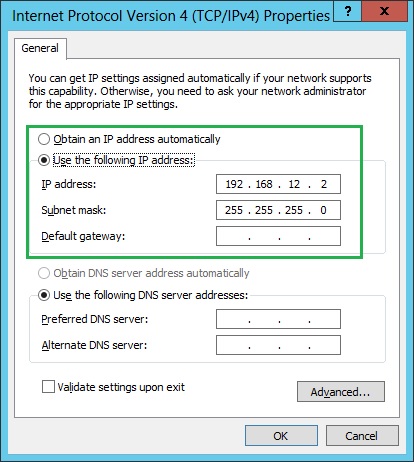
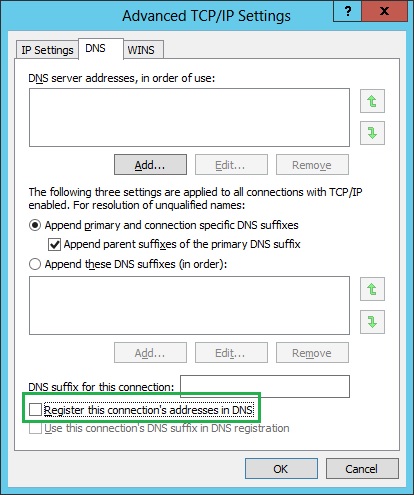
- Configure the Private Cluster Network:
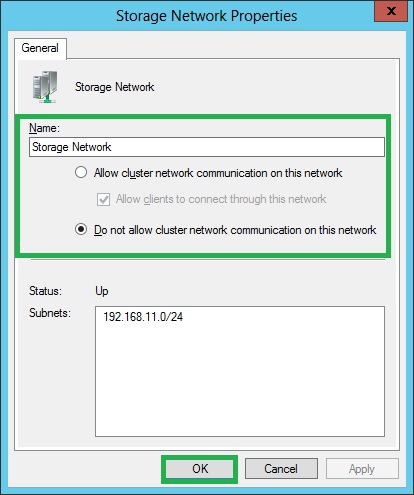
- Configure the Storage Network:
- For the storage connection, we have renamed as Storage Network.
- Do the same as the Private Cluster Network TCP/IP settings.
- Configure the Public NetworkHere we have defined Public Network as Production. Deselect any unnecessary protocols or features that will not be used or is not necessary.
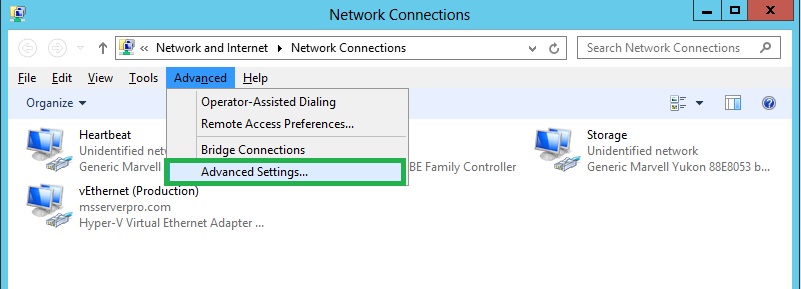
- Set the Network Priority (arrange binding order)

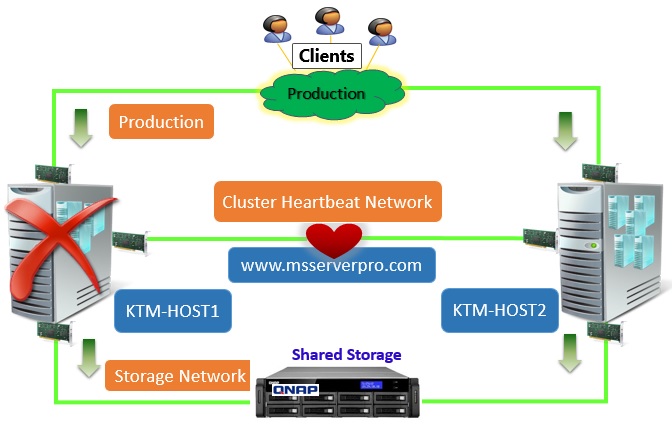
Lab Environment:
- One Domain Controller, named KTM-DC01, for “msserverpro.com” domain.
- Two Hyper-V Hosts, named “KTM-HOST1” and “KTM-HOST2” are joined “msserverpro.com”.
- Both Hyper-V Hosts contain 3 network cards as shown in figure.
- Production network – 192.168.10.0 /24
- Cluster Heartbeat Network – 192.168.12.0/24
- Storage Network – 192.168.11.0/24
- One virtual switch, name “Production” on each Hyper-V Hosts.
- Few VMs are located on KTM-HOST1 and KTM-HOST2.
Steps to Implementing Windows Server 2012 Hyper-V Failover Clustering:
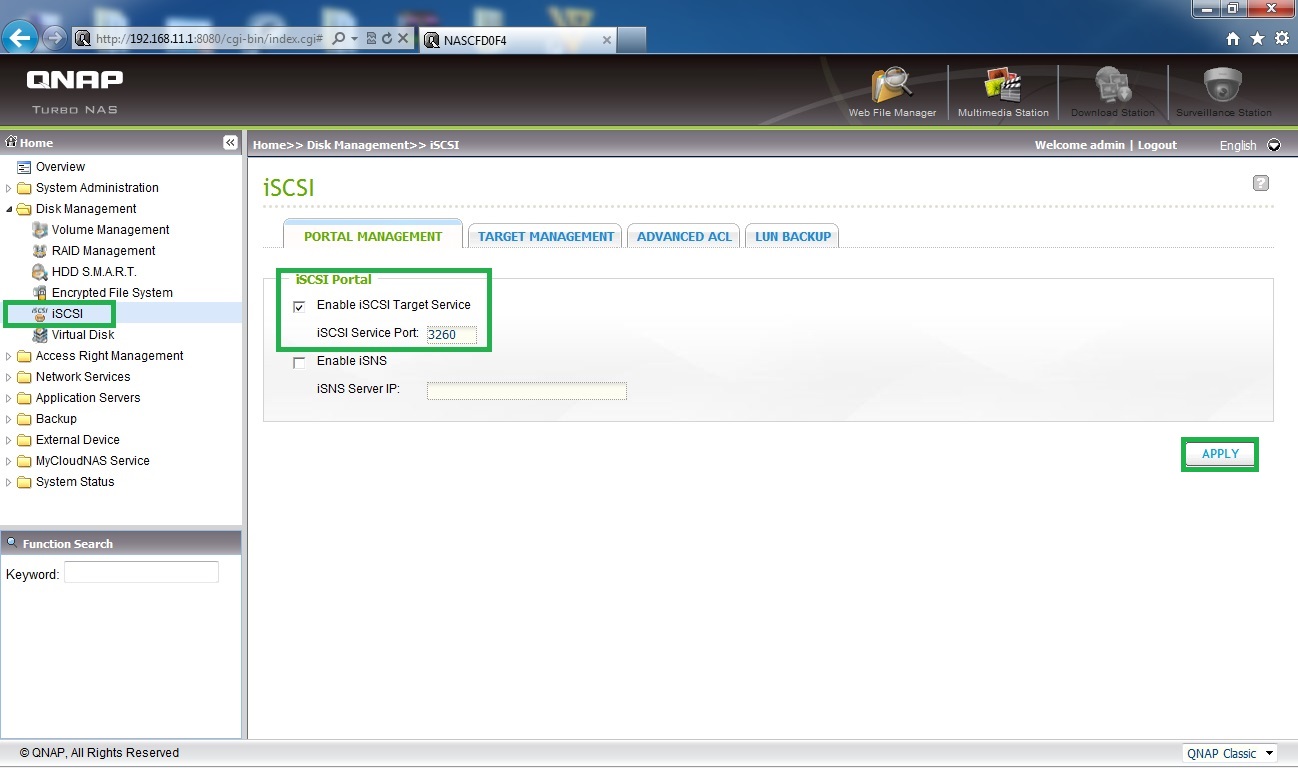
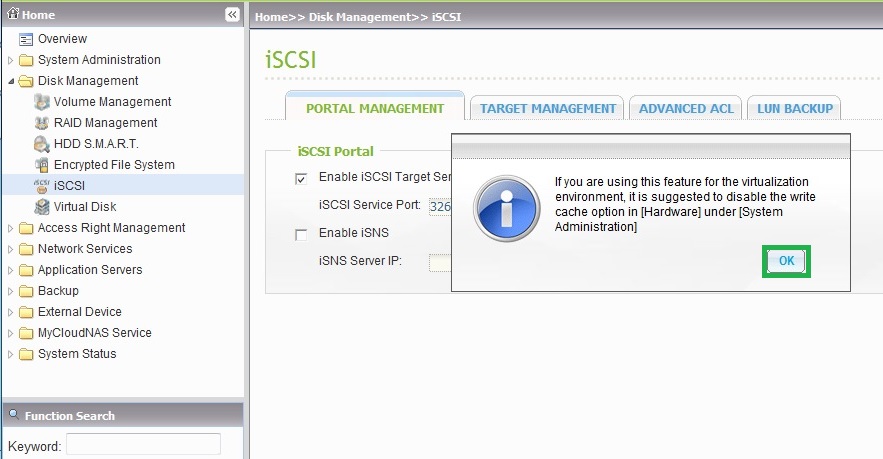
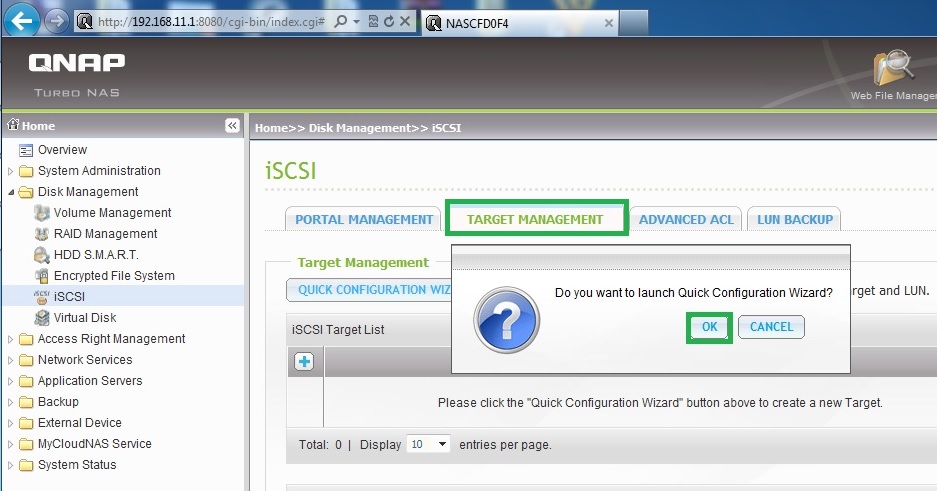
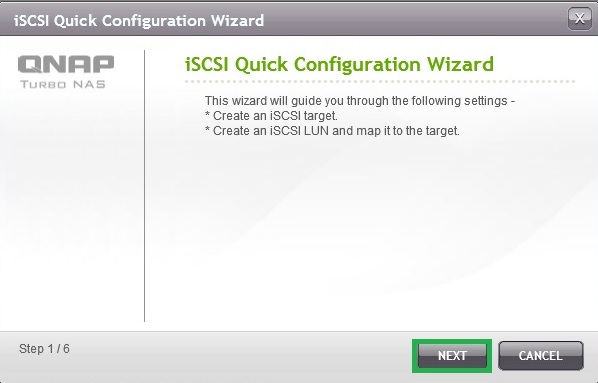
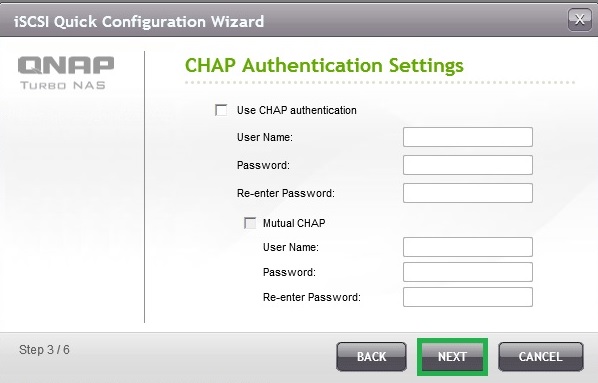
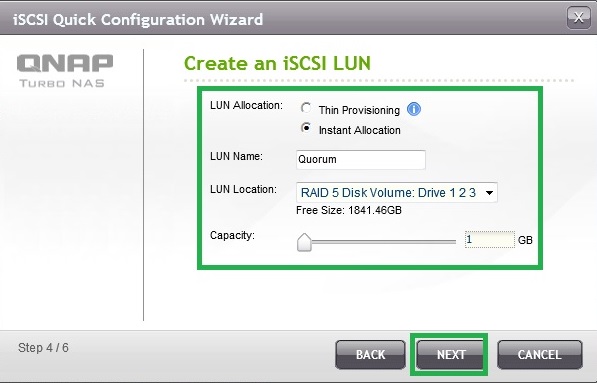
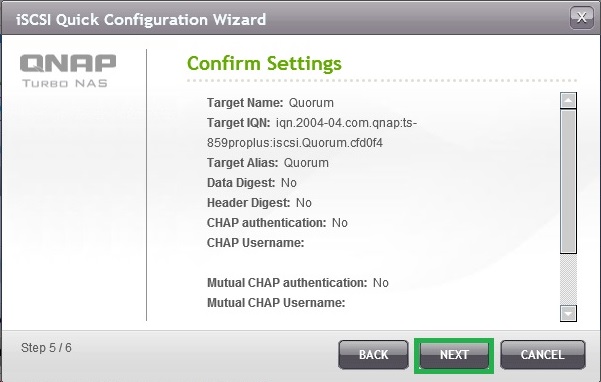
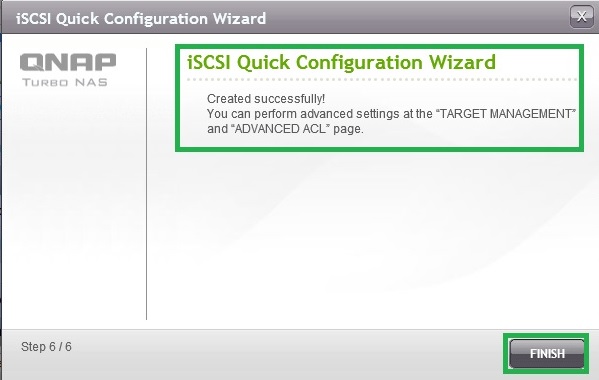
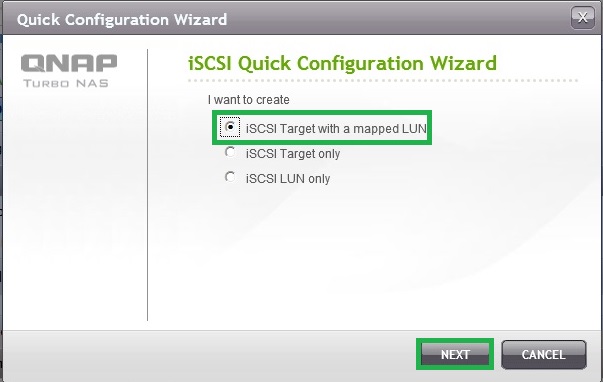
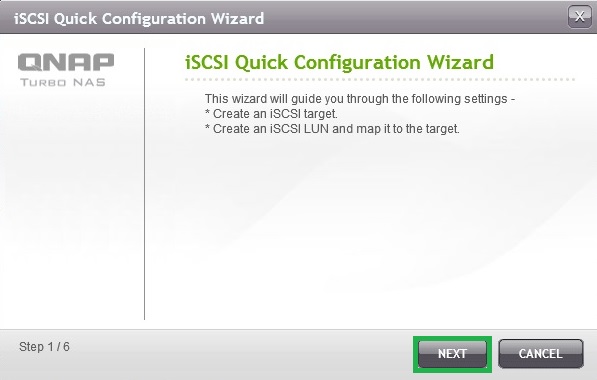
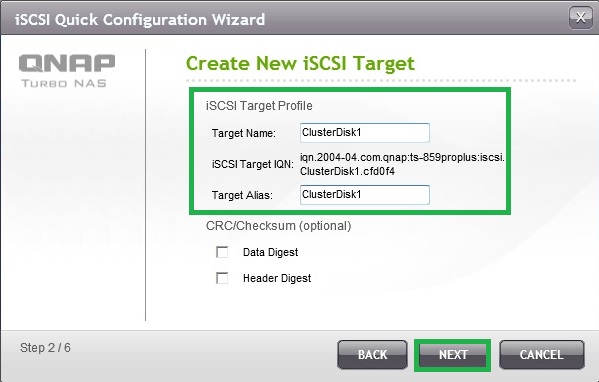
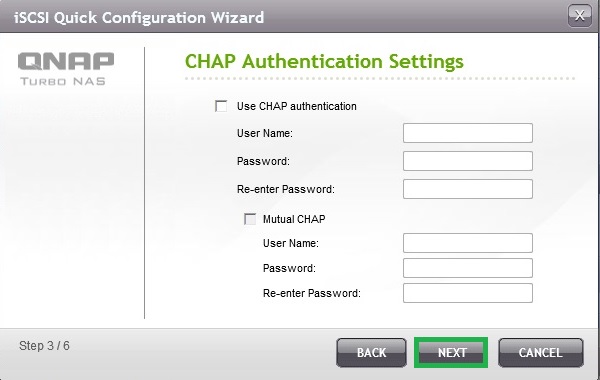
Step 1: Configure Shared Storage (iSCSI Target)
Step 2: Connect to iSCSI target from both host machines
Step 3: Initializing Disks
Step 4: Install Hyper-V Roles on both host machines
Step 5: Install Failover Cluster Features on both host machines
Step 6: Create a Virtual Switch (Production) on both host machines
Step 7: Validate the cluster configuration
Step 8: Creating a Hyper-V Failover Cluster
Step 9: Rename Cluster Networks
Step 10: Enabling Cluster Shared Volumes
Step 11: Create a VM and Configure for High Availability
Step 12: Making an existing VM Highly Available
Step 13: Testing the Failover Cluster
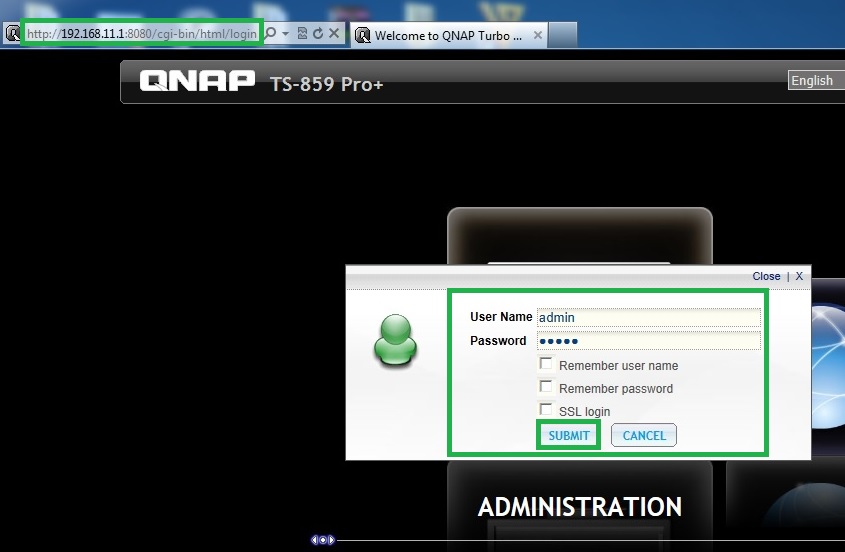
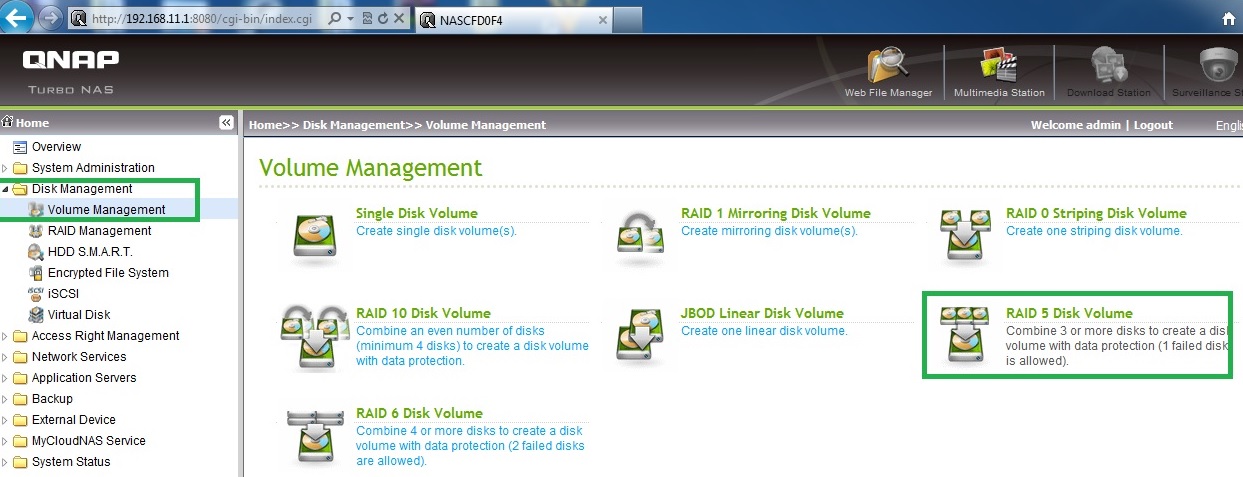
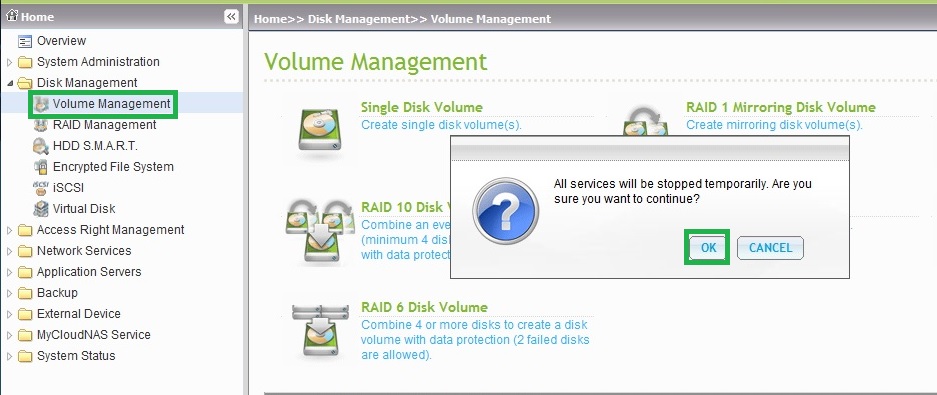
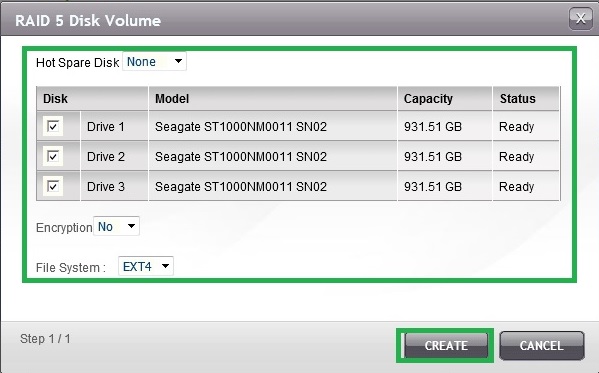
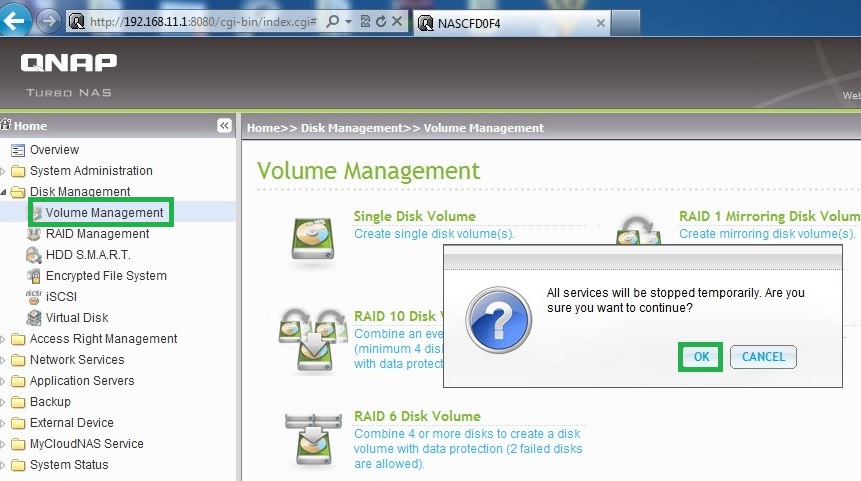
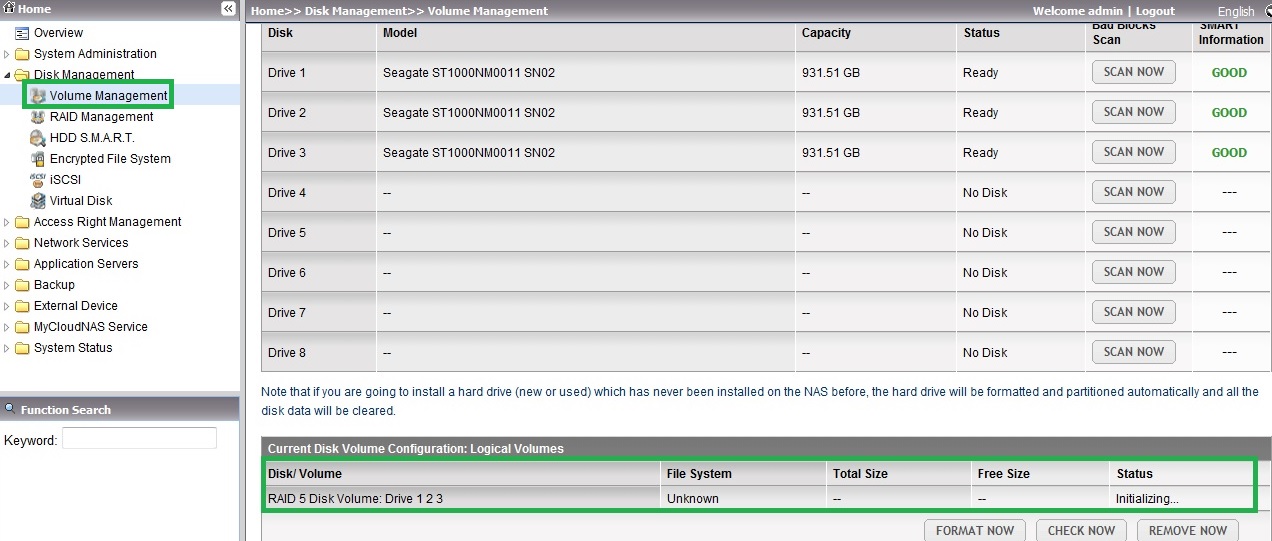
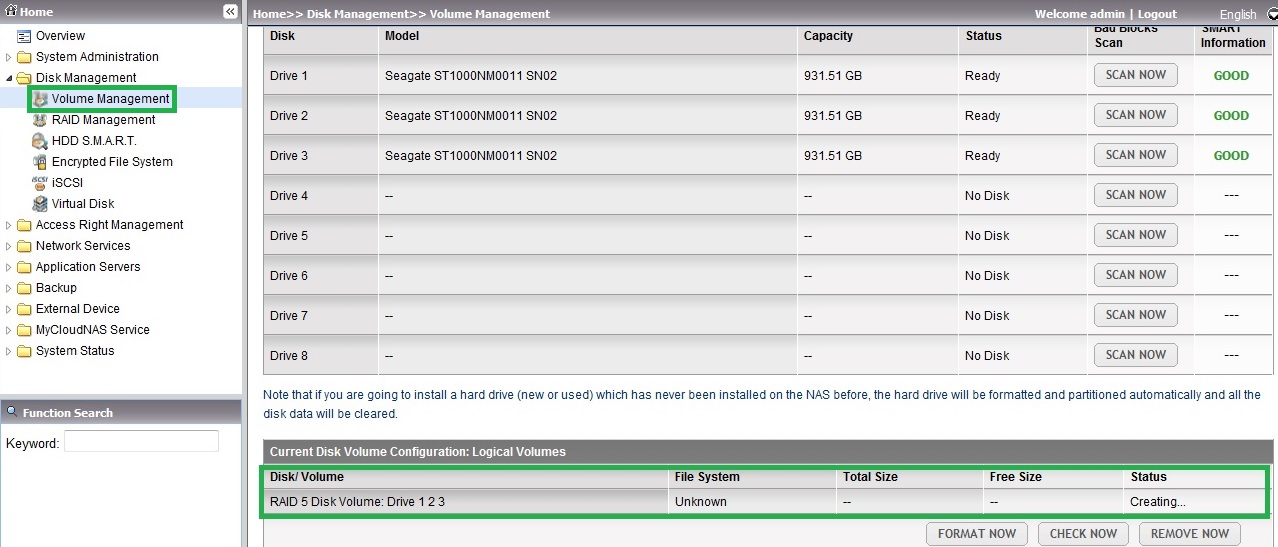
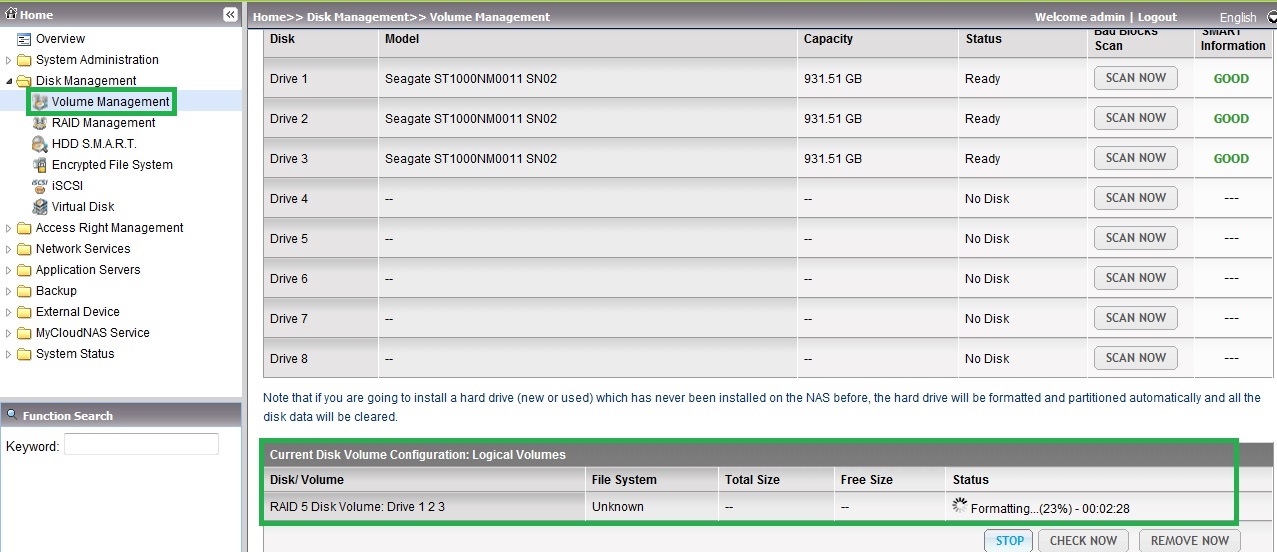
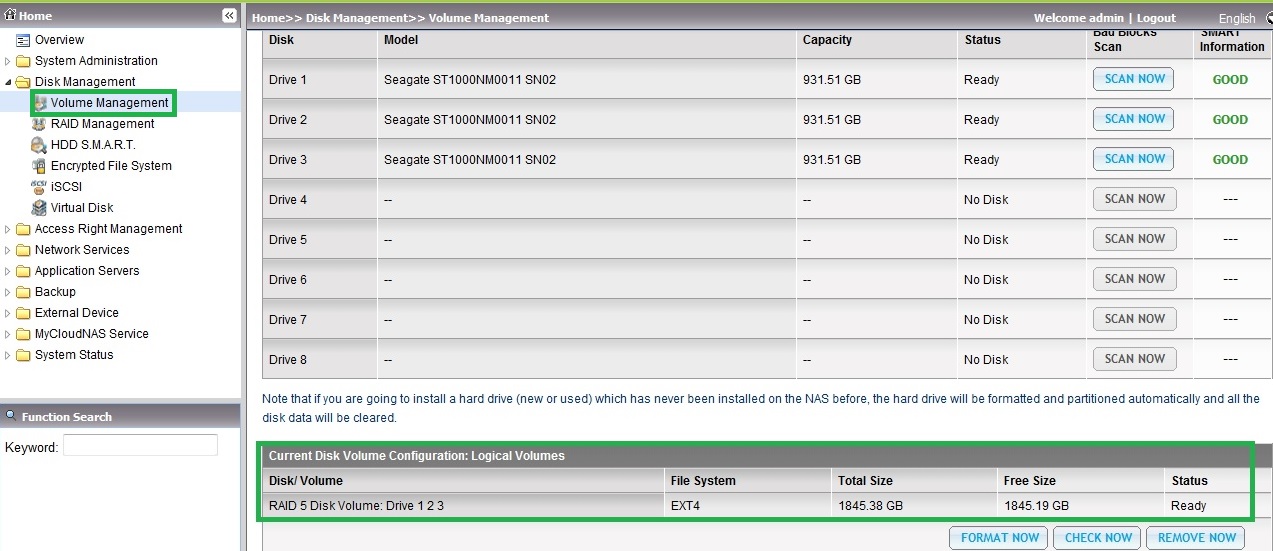
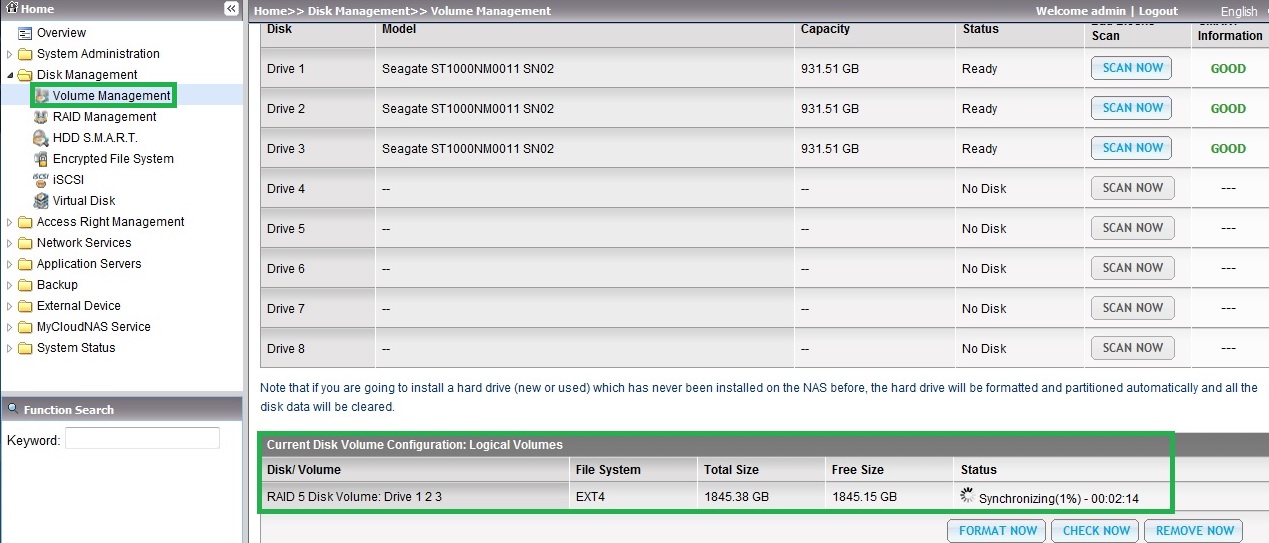
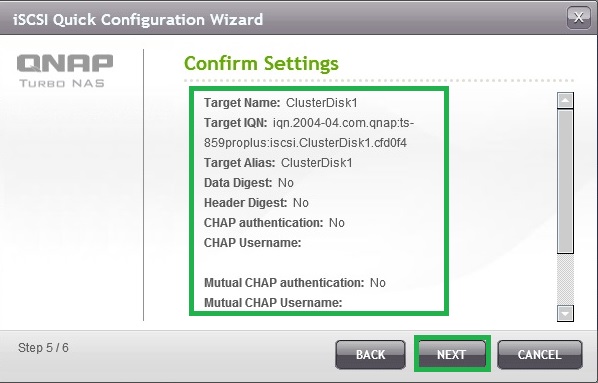
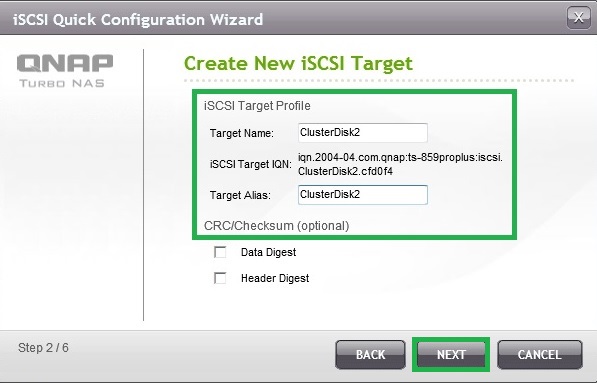
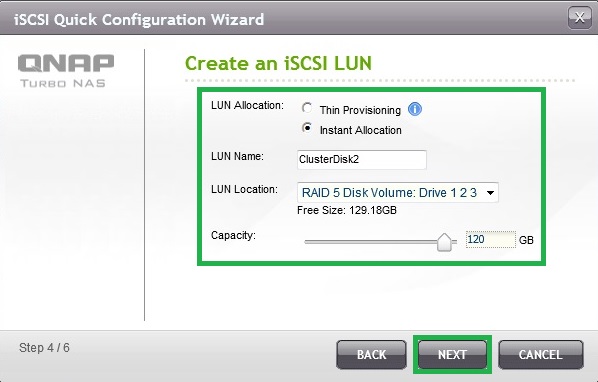
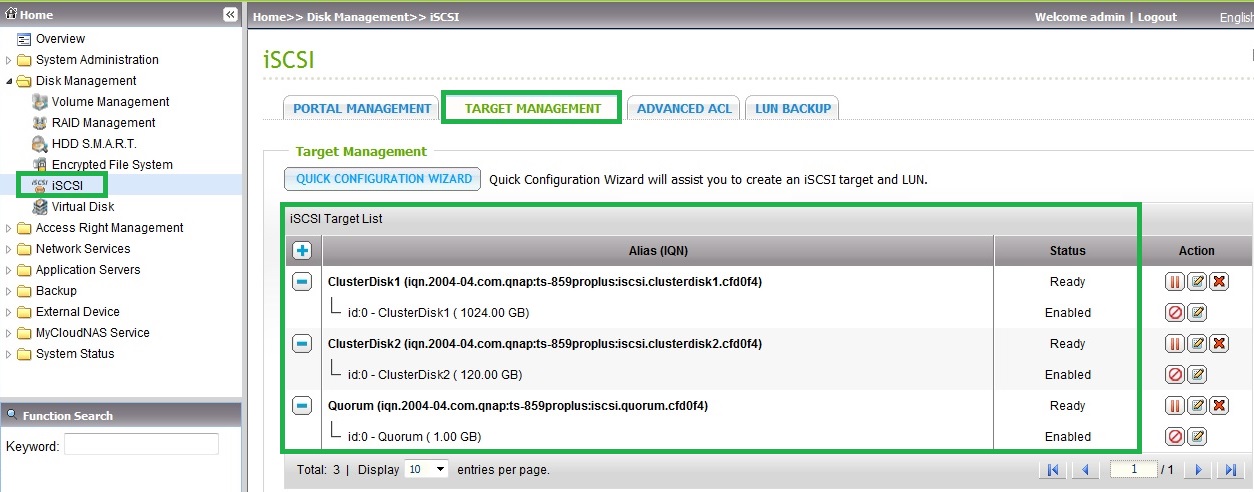
Step 1: Configure Shared Storage (iSCSI Target)
Here we are using QNAP shared storage


Step 2: Connect to iSCSI target from both Hyper-V HOSTS
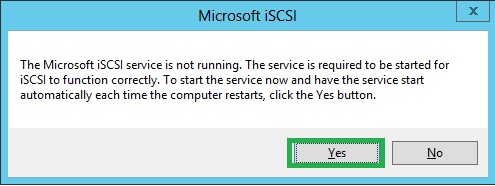
1. On the KTM-HOST1, Open Server Manager, click Tools, and then click iSCSI Initiator. At the Microsoft iSCSI prompt, click Yes.

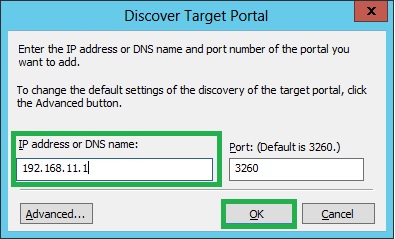
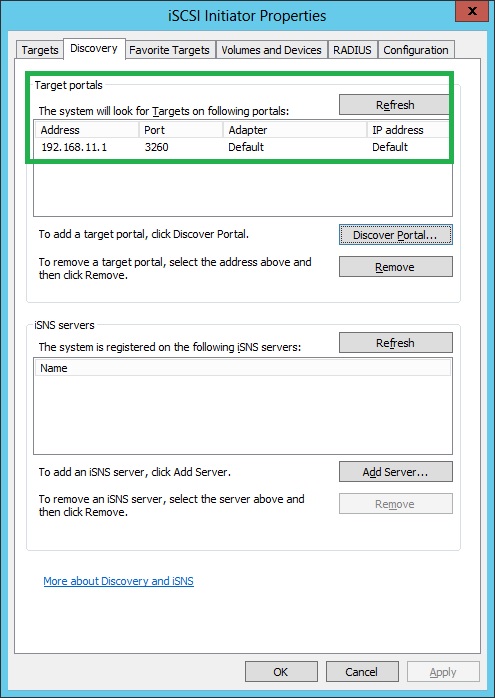
2. On the iSCSI Initiator Properties dialog box, click Discovery tab and then click Discover Portal.

On the Discover Target Portal, In the IP address or DNS name box, 192.168.11.1, which is the IP Address ofiSCSI target server and then click OK.
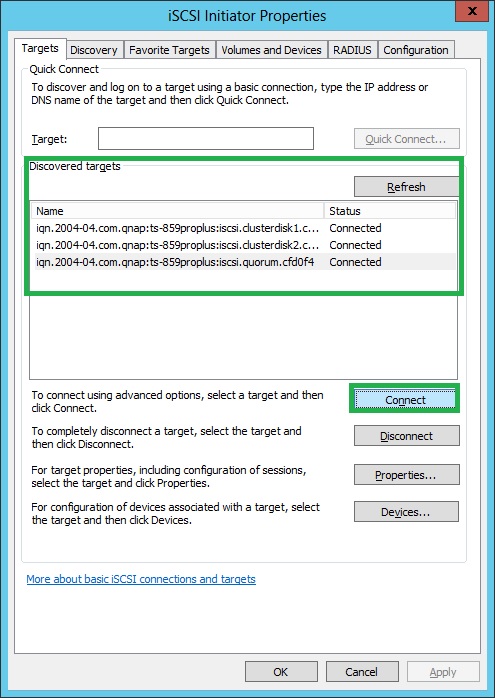
4. Click Targets tab. Click Refresh. The previously created targets are listed in the Discovered targets section. Select each of the targets list and click Connect to add them.
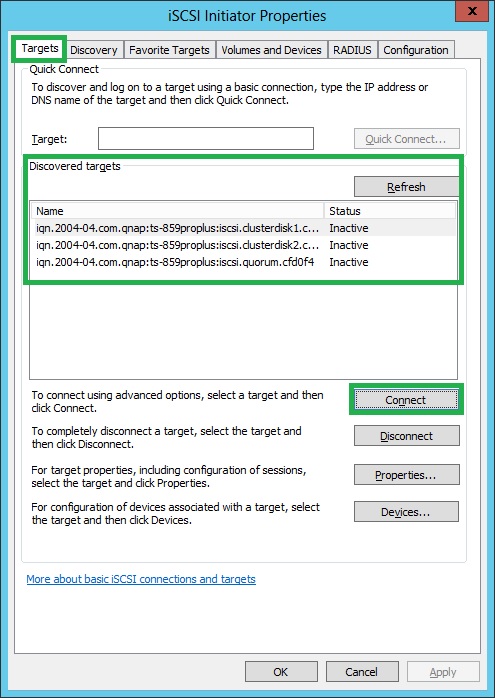
5. On the Connect To Target dialog box, select Add this connection to the list of Favorite Targets, and then click OK.
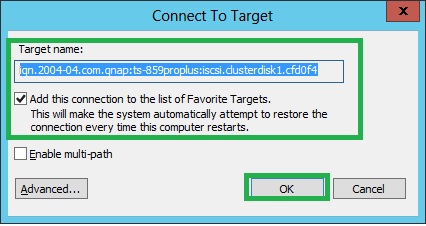
6. Click OK to close iSCSI Initiator Properties.
7. Do the same process on KTM-HOST2.
Step 3: Initializing Disks
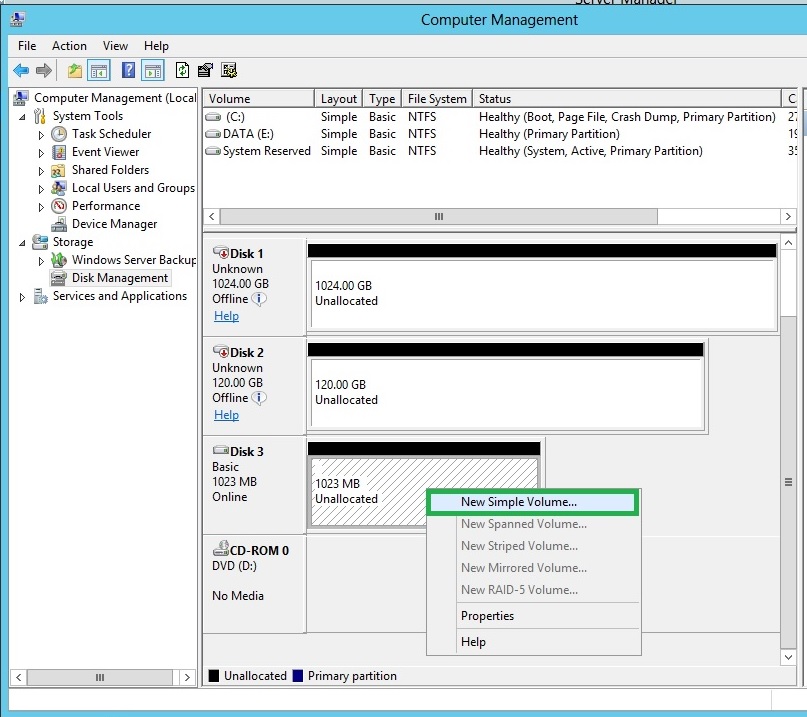
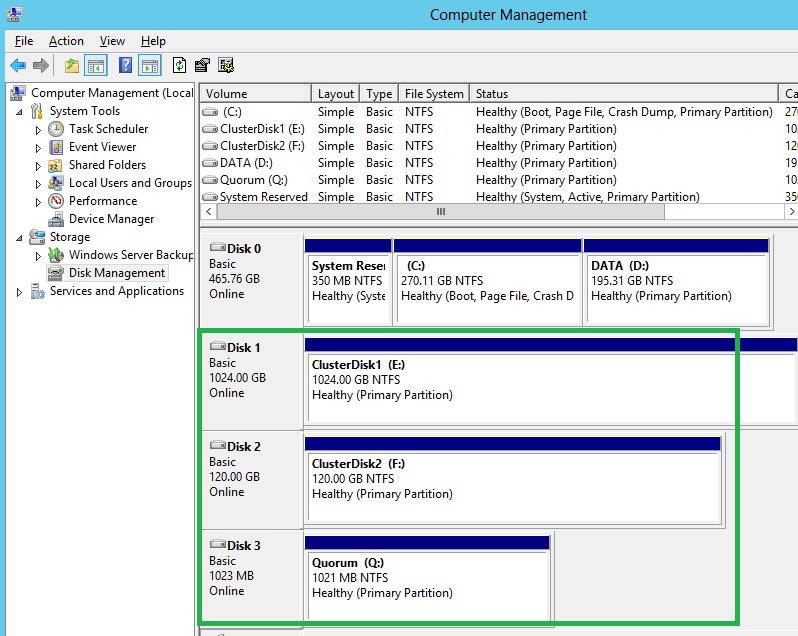
1. On the KTM-HOST1, Open Server Manager, click Tools, and then click Computer Management.
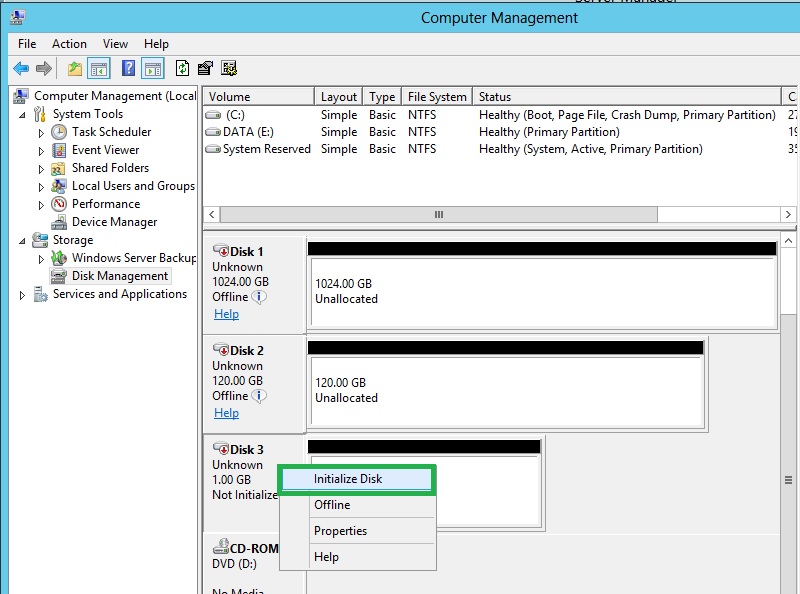
2. On the Computer Management, go to Storage and then click Disk Management.
3. Right-click on Disk 3, and then click Online.

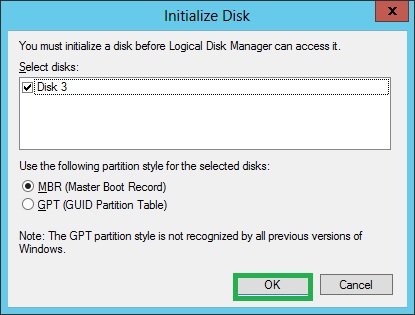
4. Right-click on Disk 3, and then click Initialize Disk. In the Initialize Disk dialog box, click OK.
5. On Disk 3, Right-clickon the unallocated space, and then click New Simple Volume.
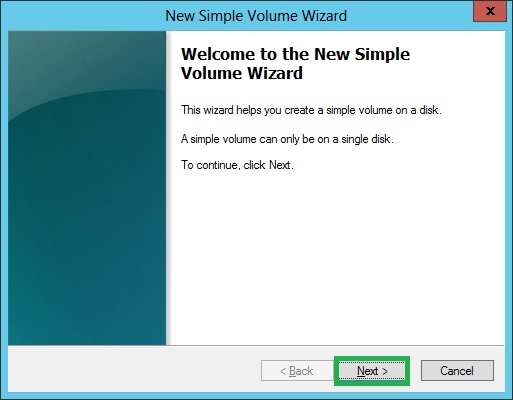
6. On the Welcome to the New Simple Volume Wizard page, click Next.
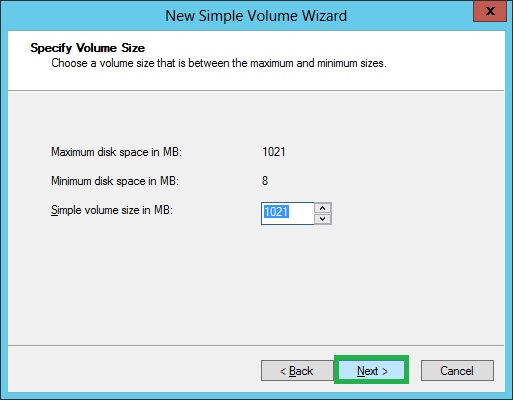
7. On the Specify Volume Size page, click Next.
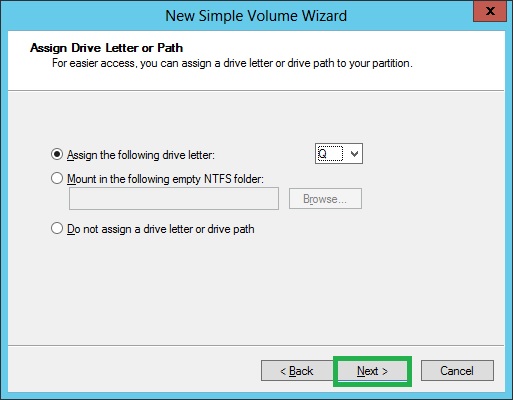
8. On the Assign Drive Letter or Path page, click Next.
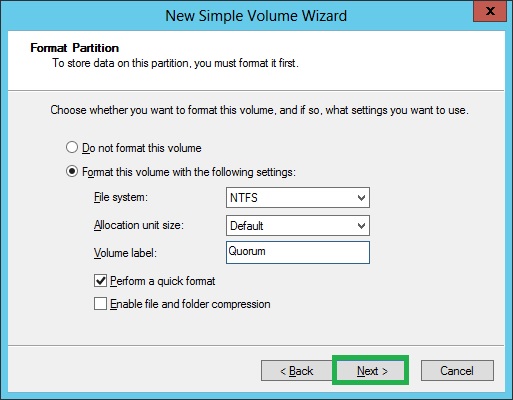
9. On the Format Partition page, in the Volume label box, type Quorum. Select the Perform a quick format check box, and then click Next.
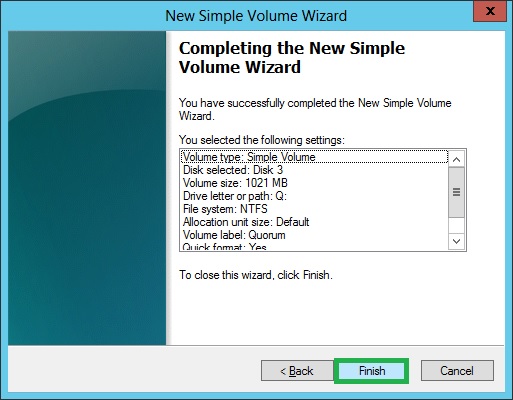
10. On the Completing the New Simple Volume Wizard page, click Finish.
11. Do the same process on remaining Disk1 and Disk2.
12. Log on KTM-HOST2, Open Server Manager, and then Open Computer Management.
13. On Computer Management page, expand Storage, and then click Disk Management.
14. Right-click on Disk Management, and then click Refresh.
15. Right-click on Disk3, and then click Online.
16. Do the same process on Disk1 and Disk2.
Step 4: Install Hyper-V Server Roles on both Hyper-V Server
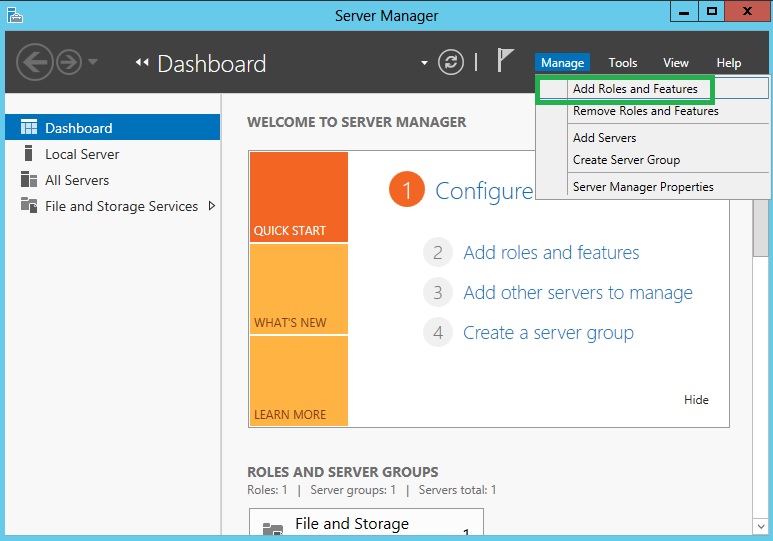
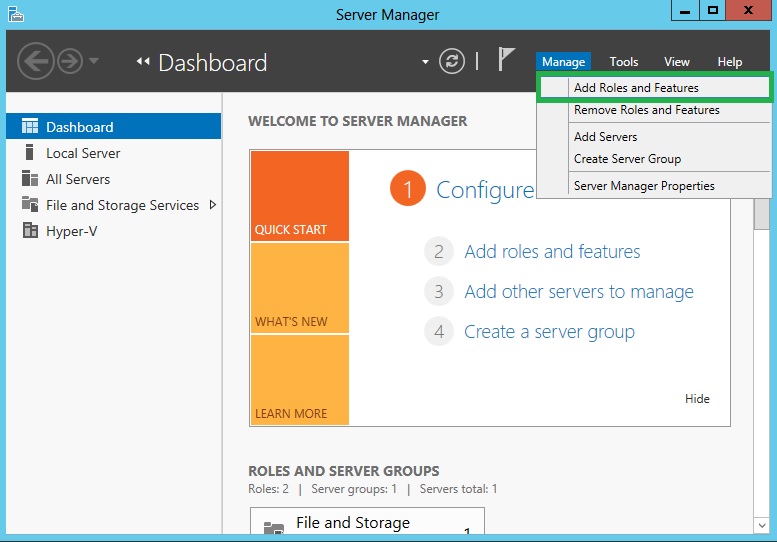
1. On the KTM-HOST1, Open Server Manager, click on the Manage Menu, and then click Add Roles and Features.
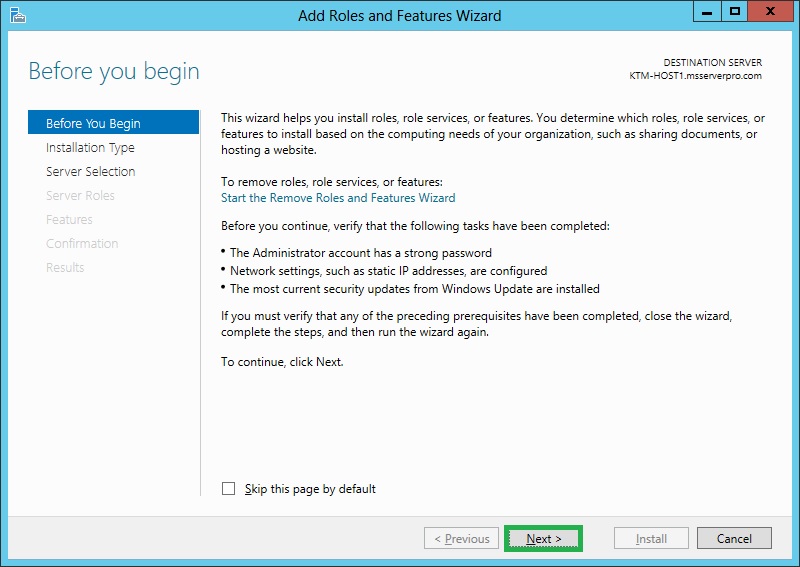
2. On the Before you begin page of Add Roles and Features Wizard page, click Next.
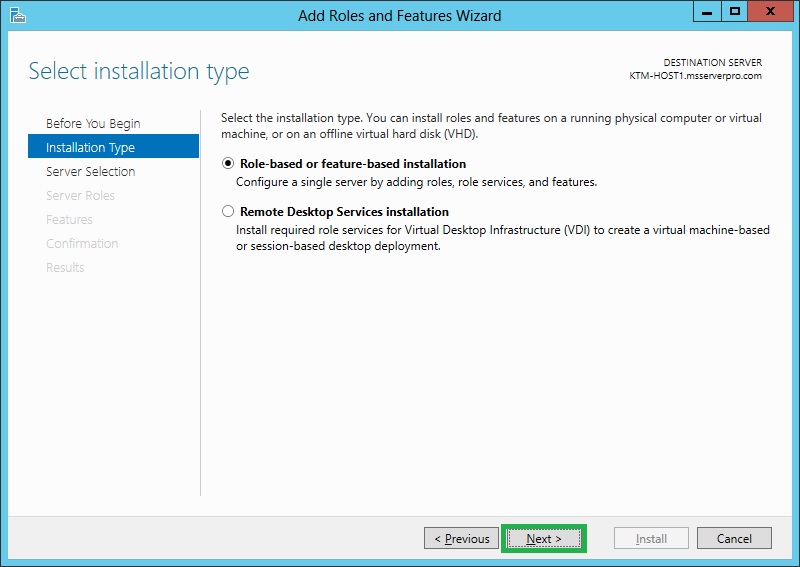
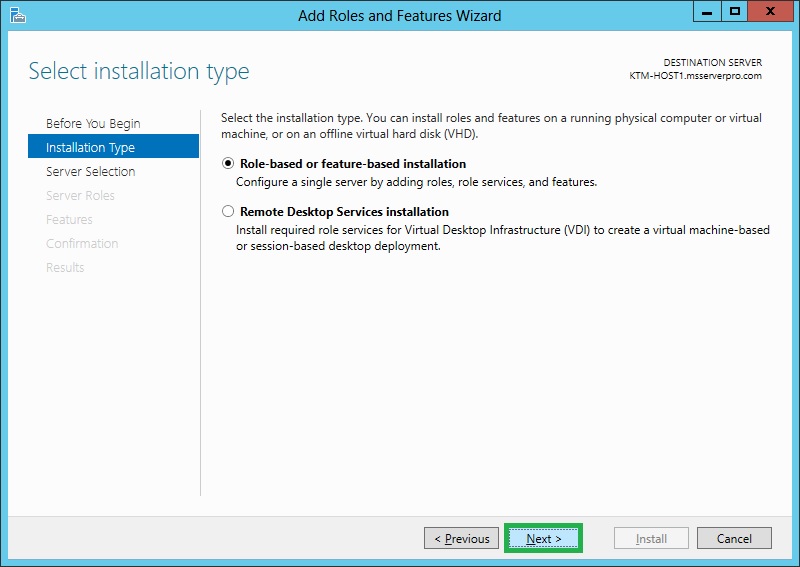
3. On the Select installation type, select Role-based or feature-based installation, click Next.
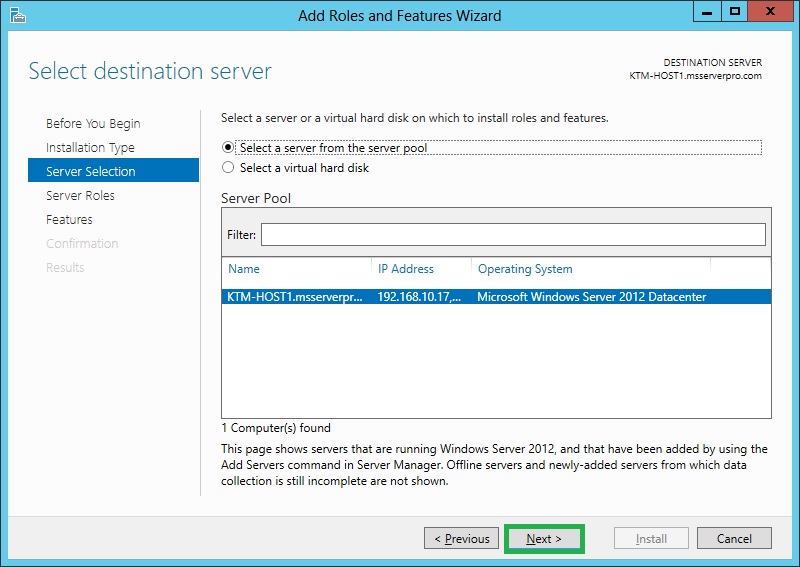
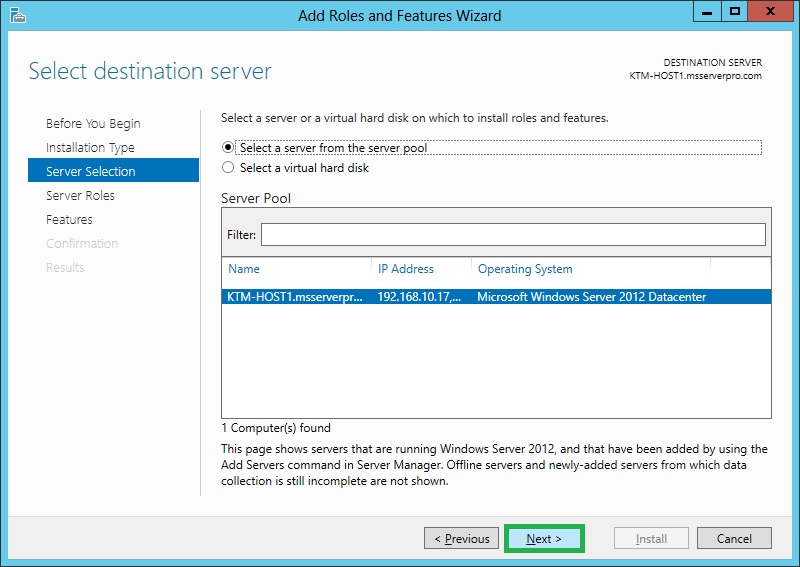
4.On the Select destination server, ensure that KTM-HOST1.msserverpro.comis selected and click Next.
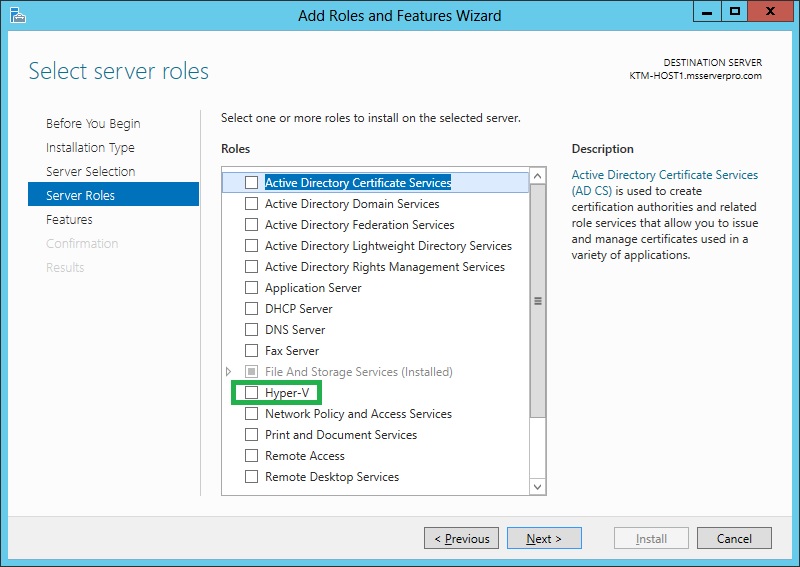
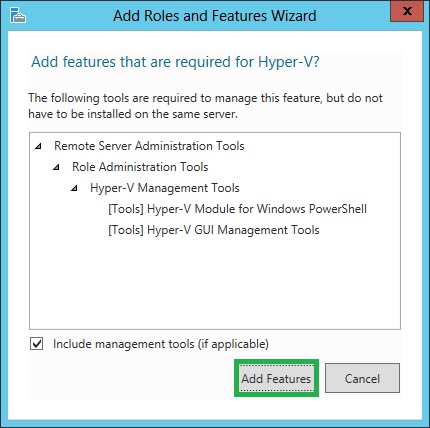
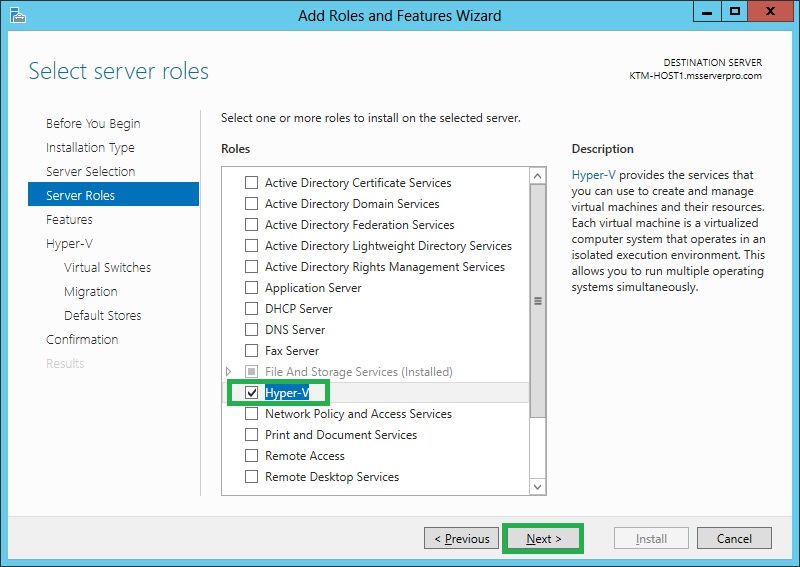
5. On the Select server roles page, select Hyper-V, In the Add Roles and Features Wizard dialog box, clickAdd Features and then click Next.
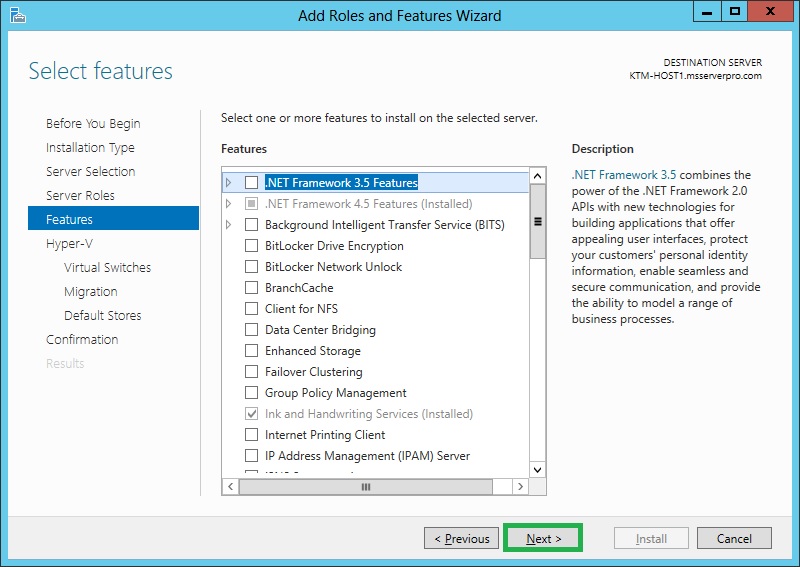
6. On the Select features page, click Next.
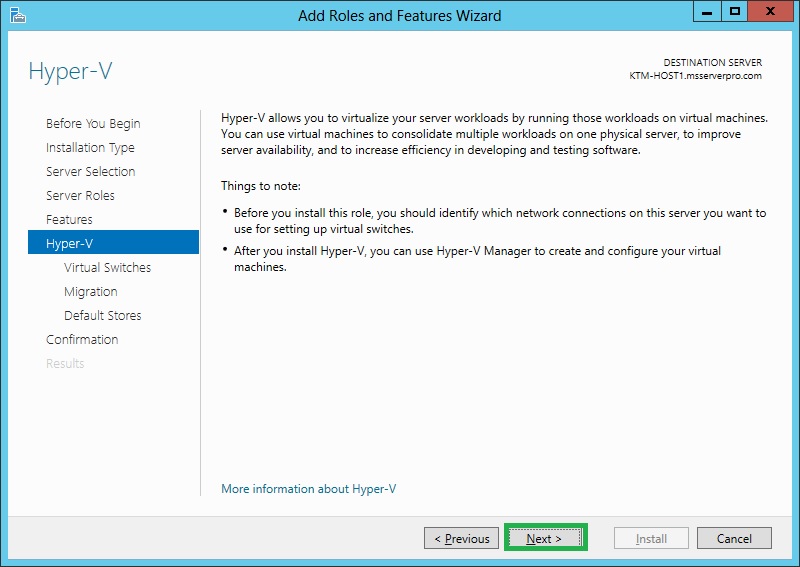
7. On the Hyper-V page, click Next.
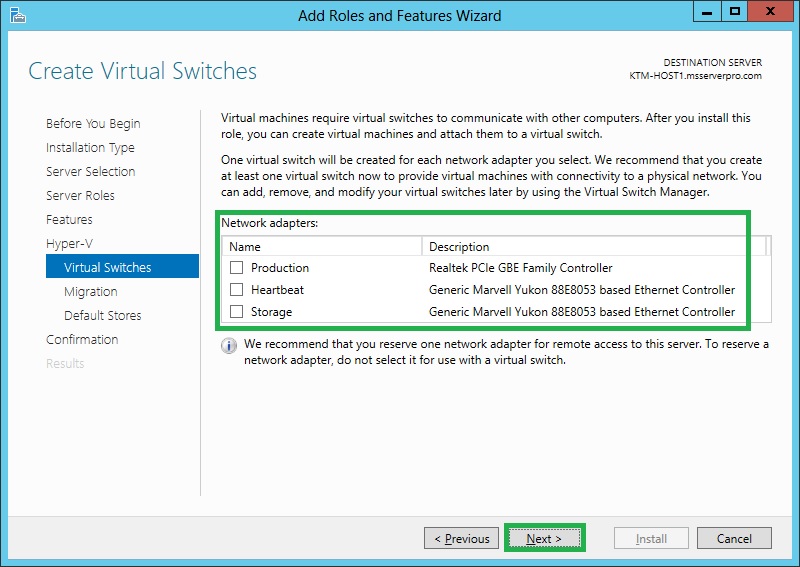
8. On the Create Virtual Switches page, make sure no selection have been made, and click Next.
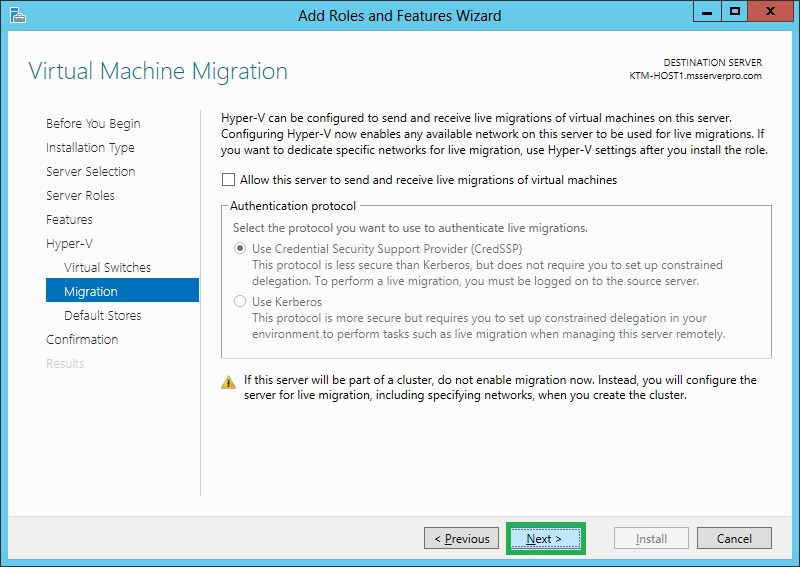
9. On the Virtual Machine Migration page, click Next.
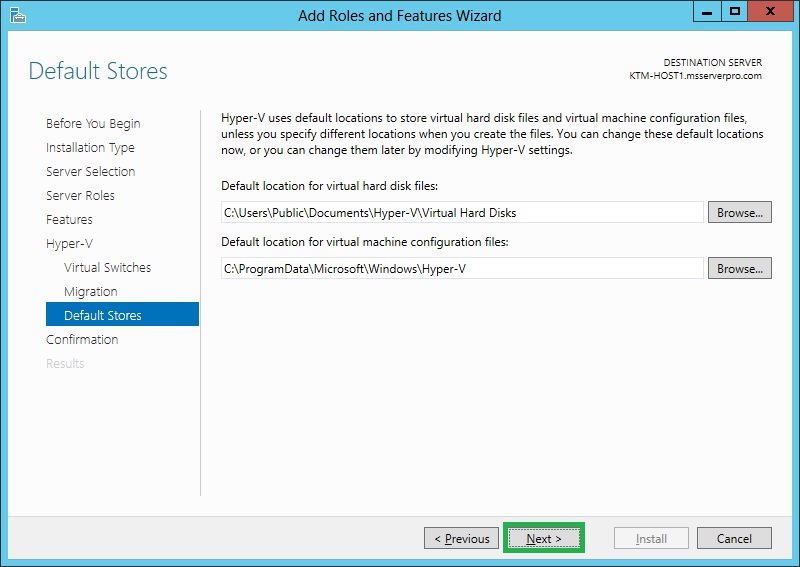
10. On the Default Stores page, click Next.
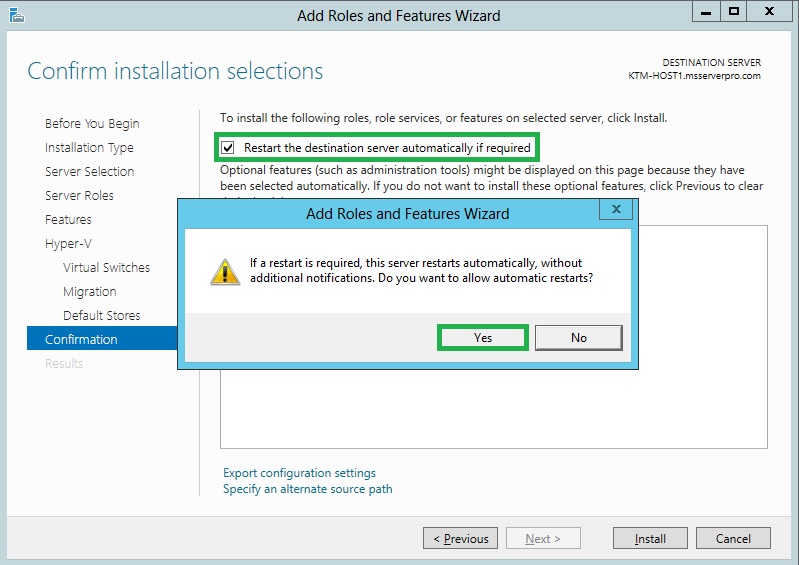
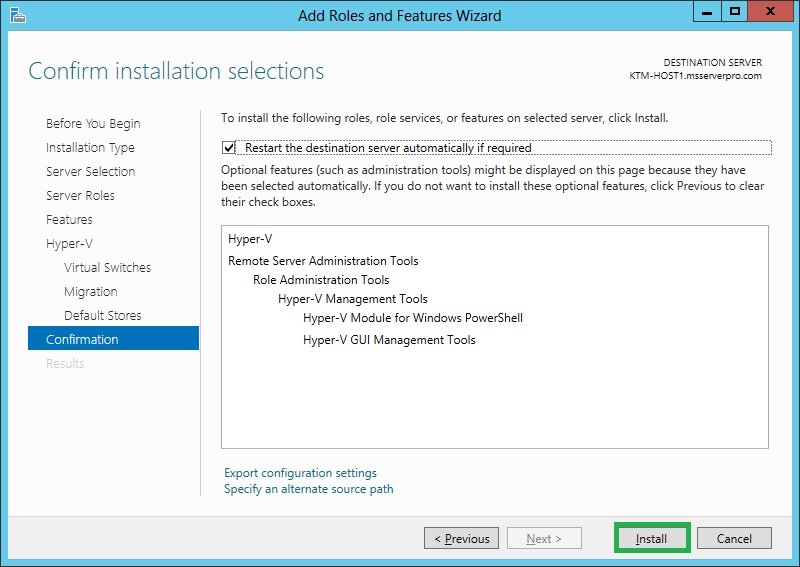
11. On the Confirm installation selections page, select Restart the destination server automatically if required, In the Add Roles and Features Wizard dialog box, click Yes and then click Install.
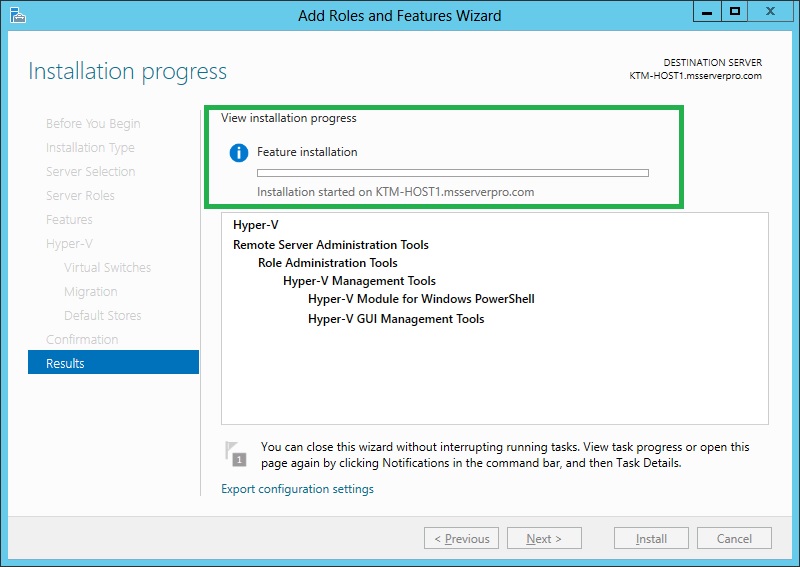
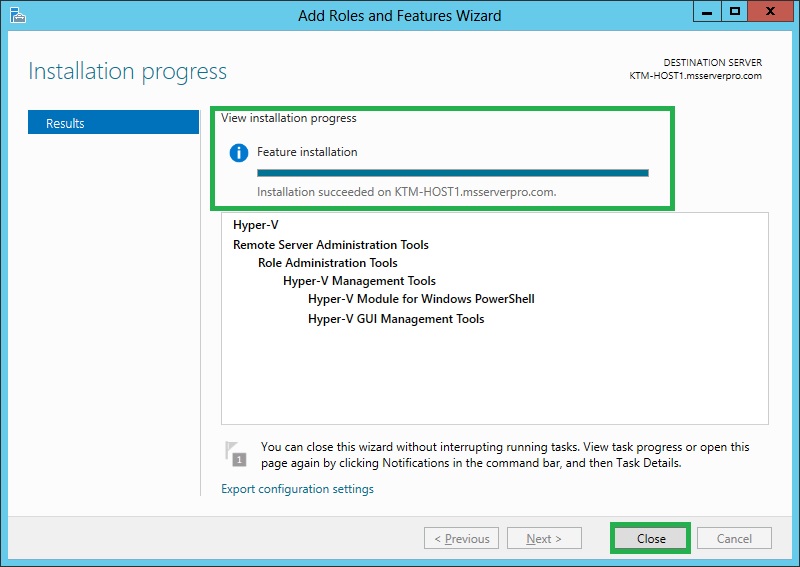
12. Then the Installation progress begins, and verify Installation succeeded and then click Close.
13. Do the same process on KTM-HOST2.
Step 5: Create a Virtual Switch (Production)
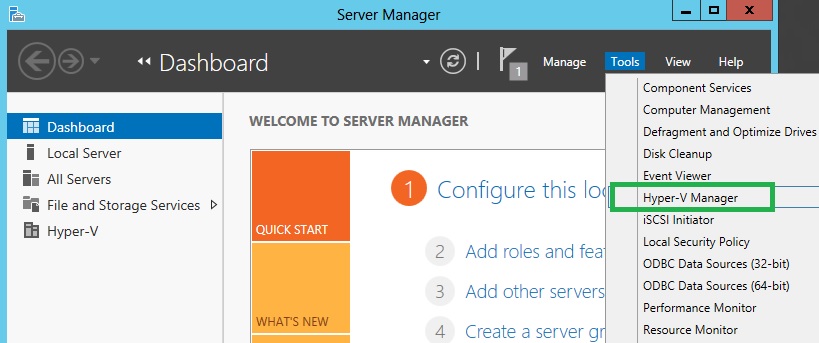
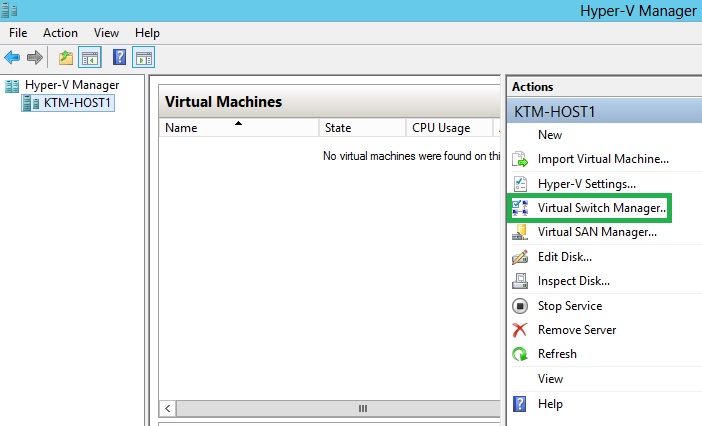
1. On the KTM-HOST1, Open Server Manager, Click Tools menu, and click Hyper-V Manager.
2. On the Hyper-V Manager console, from the Action menu, click Virtual Switch Manager.
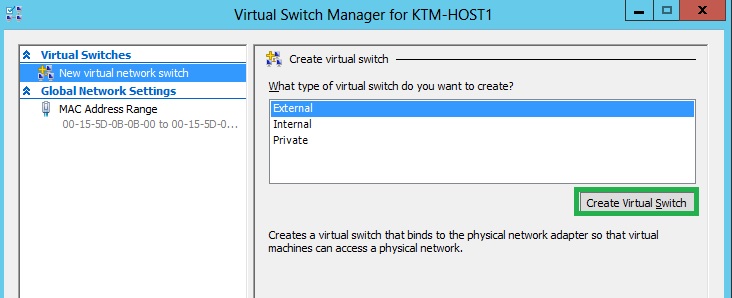
3. Under Create virtual switch, select External and then click Create Virtual Switch.
4. On the New Virtual Switch page, type Production in Name box, make sure you use exactly the same name on both Hyper-V Host server (KTM-HOST1, KTM-HOST2). In Connection type, click External network and then select the physical network adapter. Click Apply.
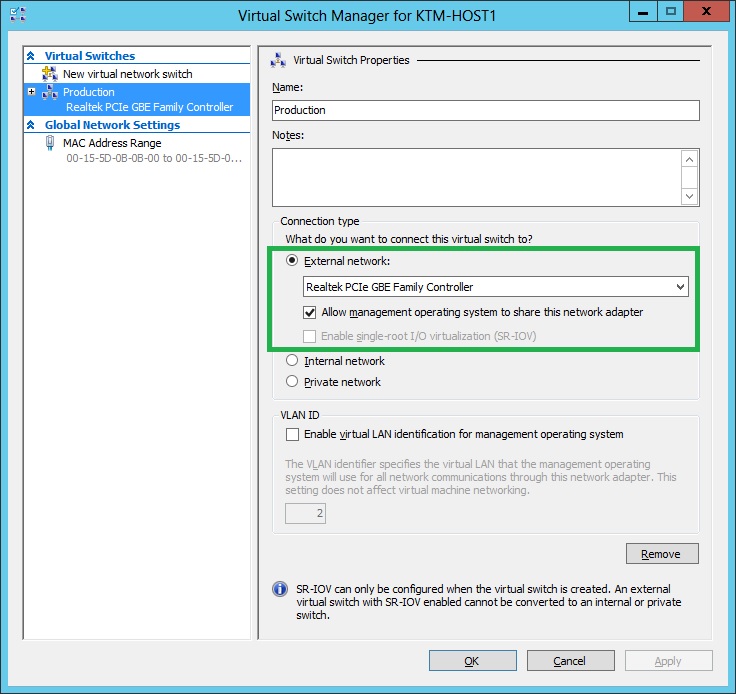
5. In the Apply Networking Changes dialog box, click Yes.


6.Do the same process on KTM-HOST2.
Step 6: Install Failover Cluster Features on both Hyper-V Server
1. On the KTM-HOST1, Open Server Manager
2. From the Dashboard, click Manage menu, and then click Add Roles and Features.
3. On the Before you begin page, click Next.

4. On the Select installation type page, select Role-based or feature-based installation and then click Next.
5. On the Select destination server page, make sure KTM-HOST1.mserverpro.com is selected underServer Pool and click Next.
6. On the Select server roles page, click Next.

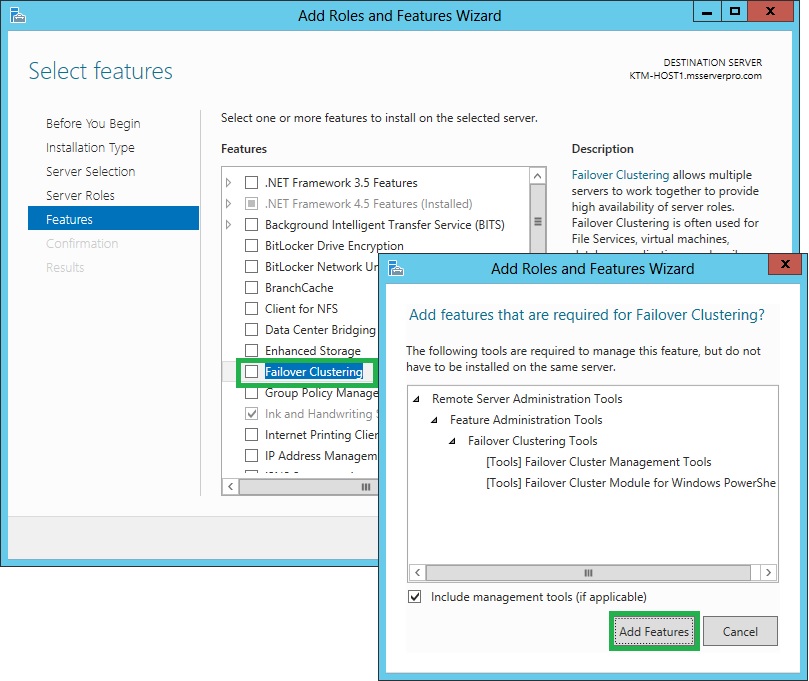
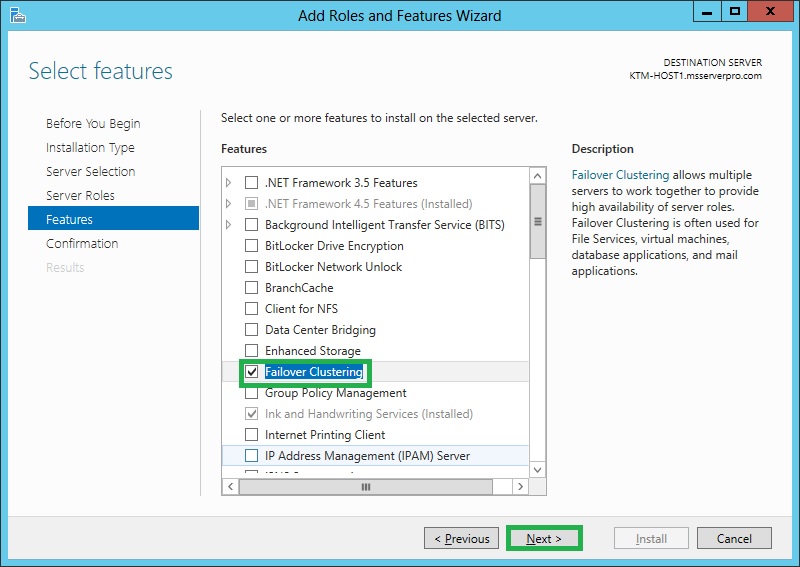
7. On the Select features page, select Failover Clustering. In the Add Roles and Features Wizard dialog box, click Add Features and then click Next.
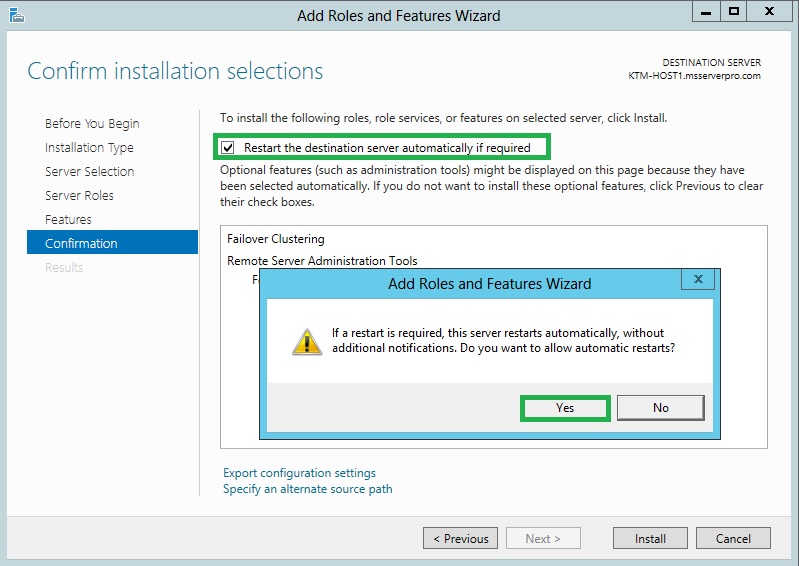
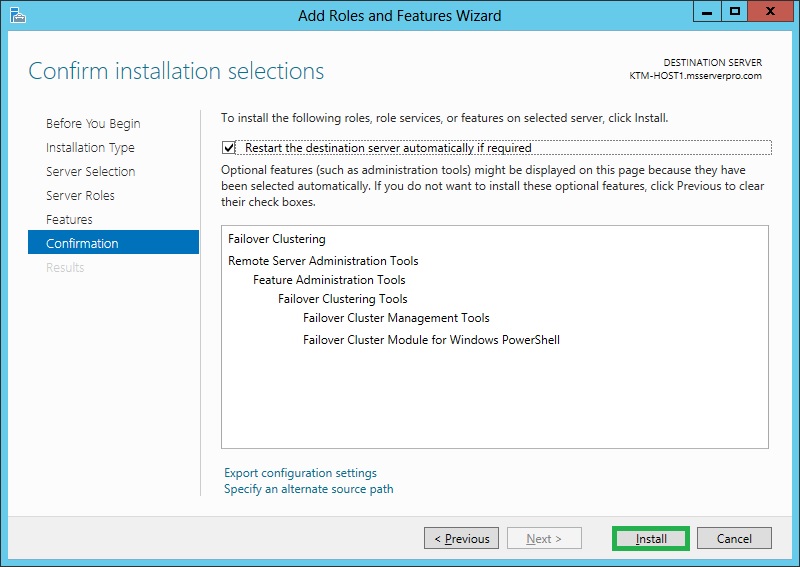
8. On the Confirm installation selections page, select Restart the destination server automatically if required. In the Add Roles and Features Wizard dialog box, Click Yes and then click Install.

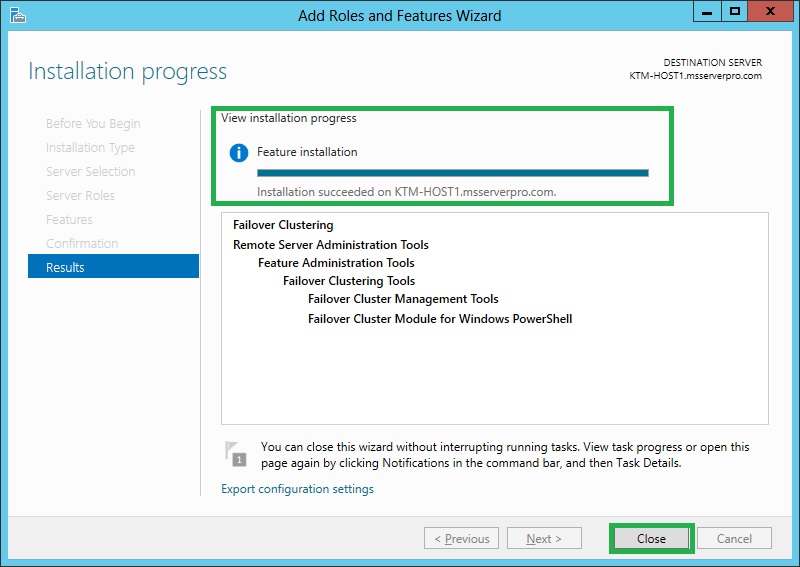
9. On the Installation progress page, Installation started and verify Installation succeeded and then clickClose.
10. Do the same process on KTM-HOST2.
Step 7: Performing Cluster Validation Tests
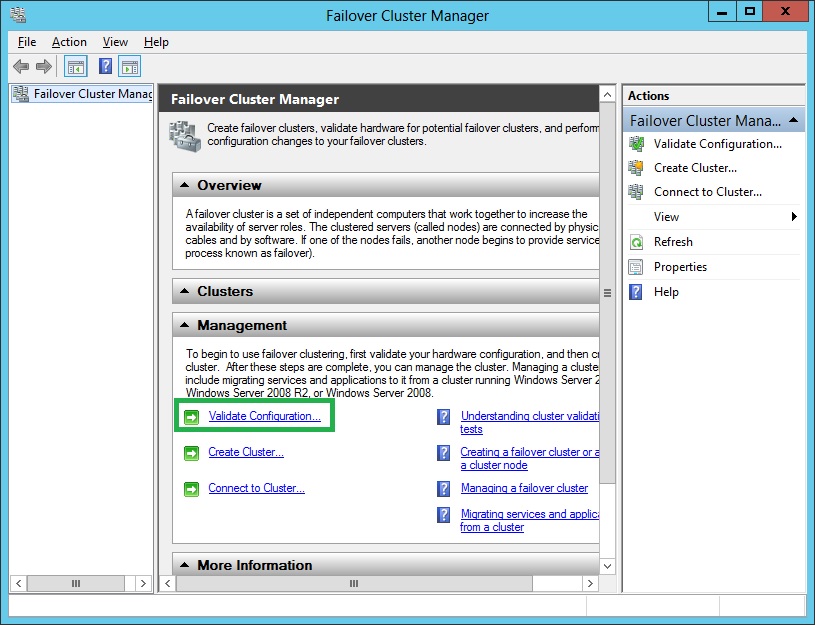
1. On the KTM-HOST1, Open Server Manager, click Tools menu and then click Failover Cluster Manager.
2. In the Failover Cluster Manager, in the center pane, click Validate Configuration under Managementpane.
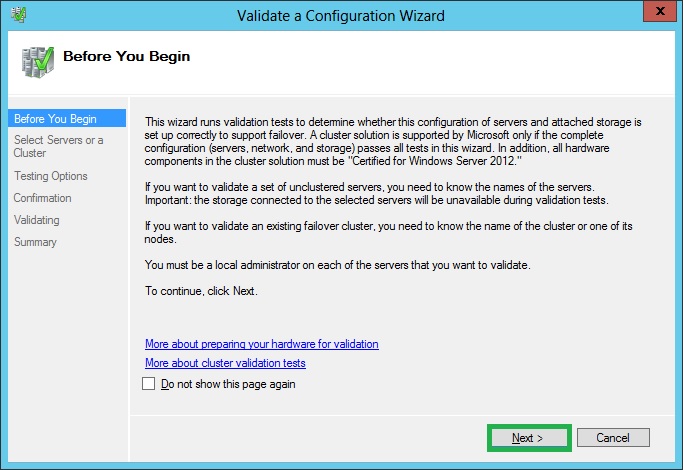
3. On the Before You Begin page, click Next.
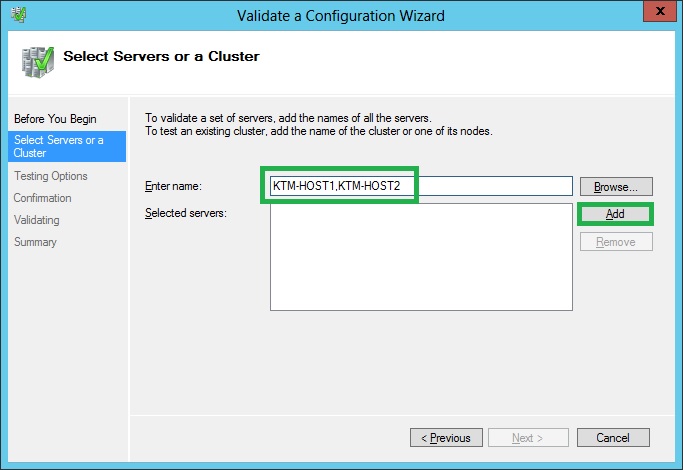
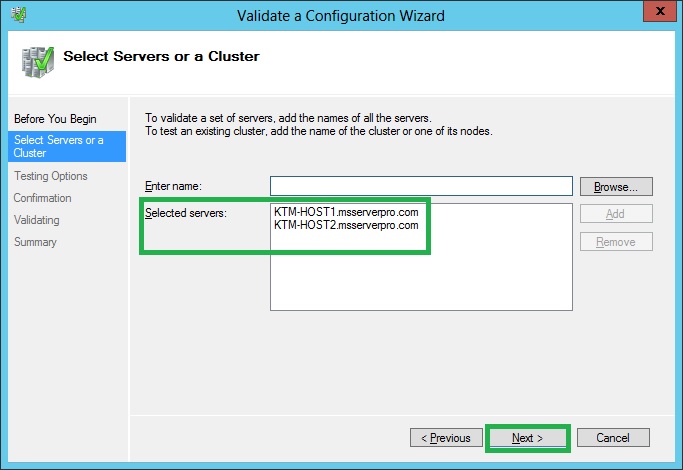
4. On the Select Servers or a Cluster page, type KTM-HOST1,KTM-HOST2 in Enter name box , click Addand verify in Selected servers list and then click Next.
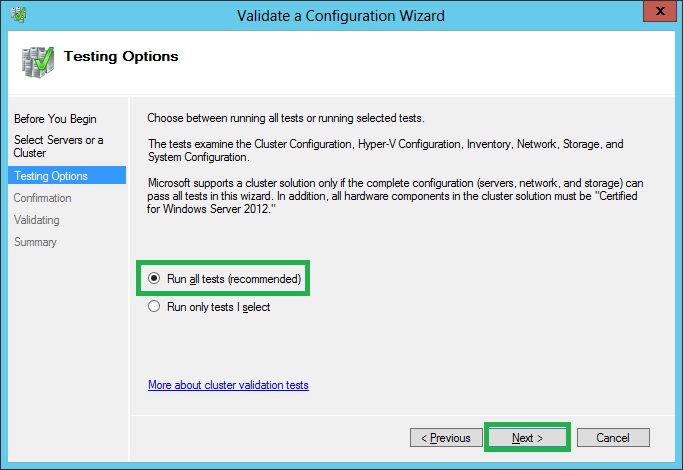
5. On the Testing Options page, select Run all tests (recommended) and click Next.
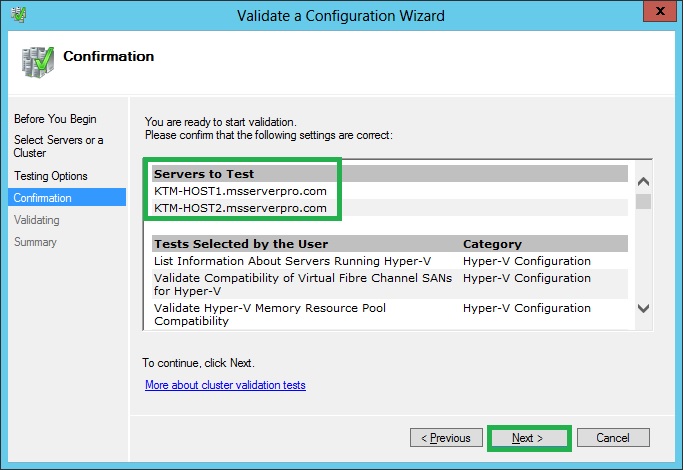
6. On the Confirmation page, confirm the Servers to Test and click Next.
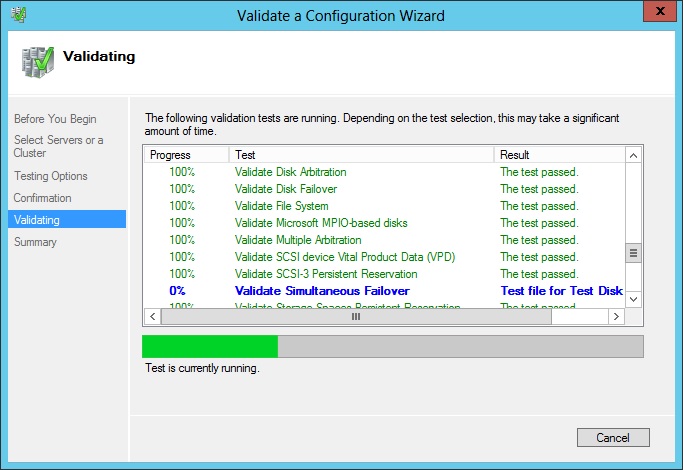
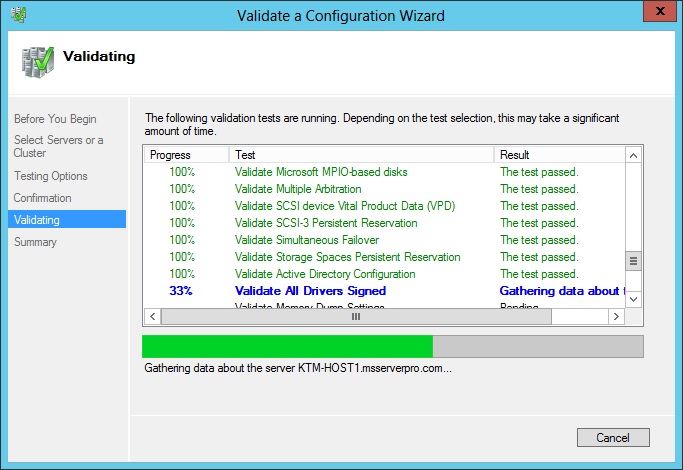
7. On the Validating page, the following validation tests are running..
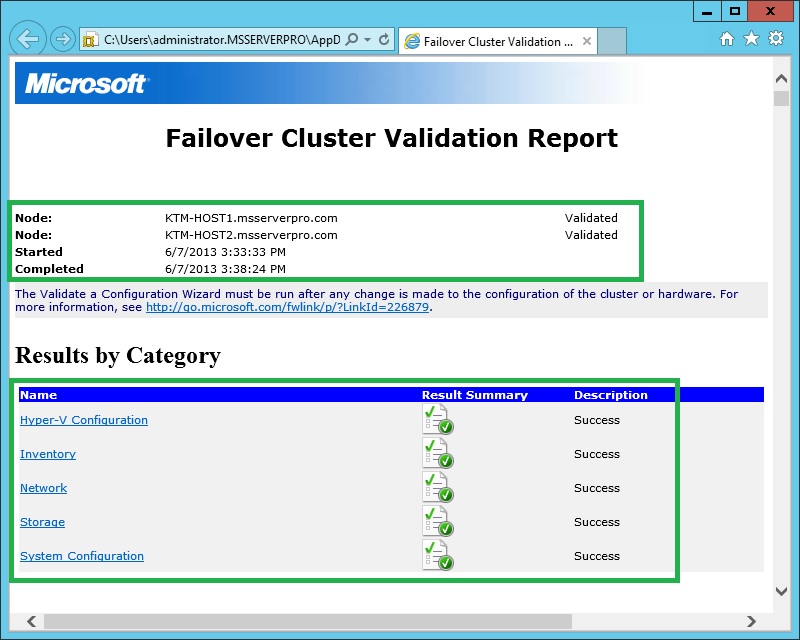
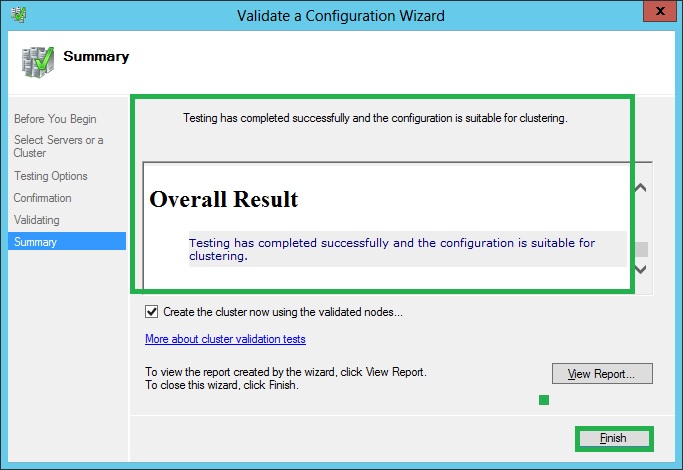
8. On the Summary page, verify Testing has completed successfully and the configuration is suitable for clustering, then click View Report for Failover Cluster Validation Report.
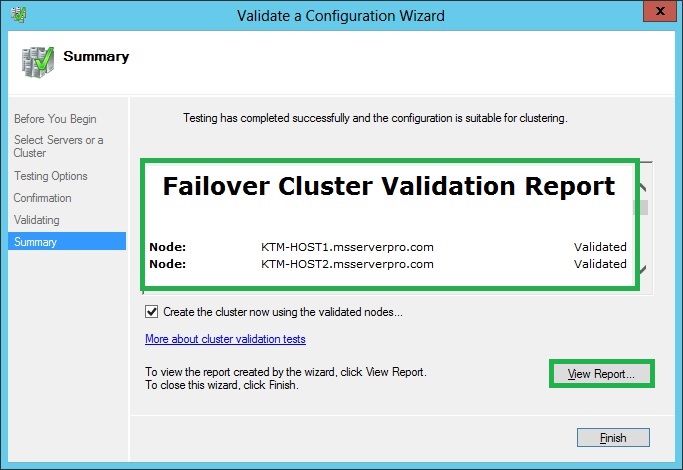
10. Click Finish.
Step 8: Creating a Hyper-V Failover Cluster
1. On the KTM-HOST1, Open Server Manager, click Tools menu and then click Failover Cluster Manager.
2. In the Failover Cluster Manager, in the center pane, click Create Cluster under Management pane.

3. On the first Before You Begin page, click Next.

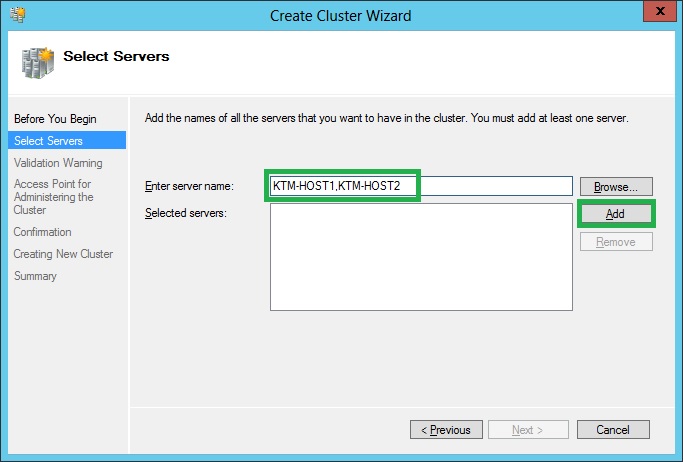
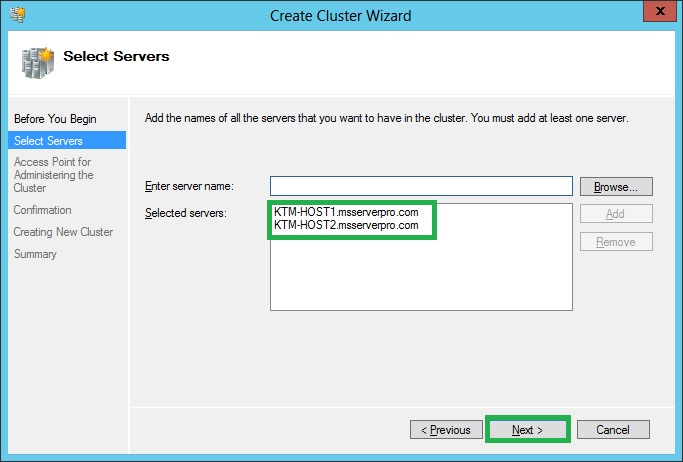
4. On the Select Server page, type KTM-HOST1, KTM-HOST2 in Enter server name box and click Add. Verify that servers are in Selected servers list and click Next.
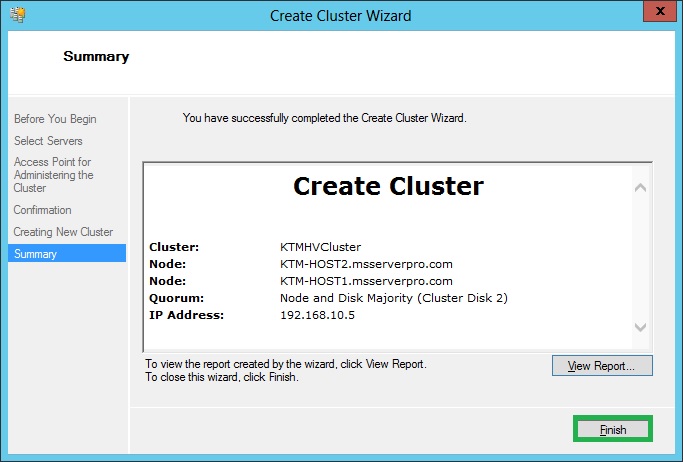
5. On the Access Point for Administering the Cluster page, in the Cluster name box, type KTMVMCluster. Under Address, in the IP address name box, type 192.168.10.5 and then click Next.

6. On the Confirmation page, verify the information and click Next.
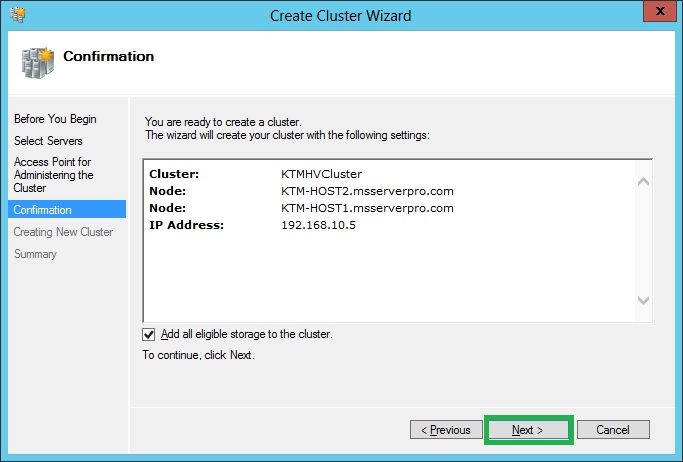
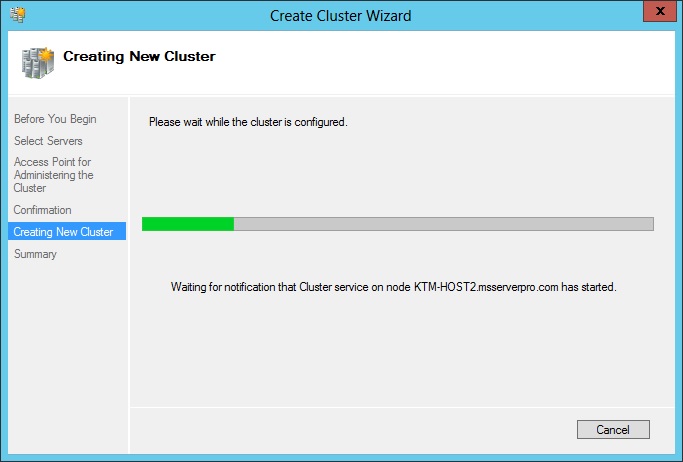
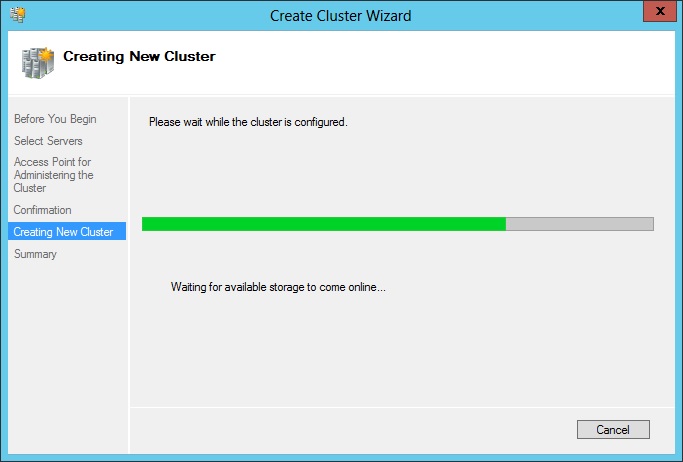
7. After this confirmation, Creating New Cluster process begins.
8. On the Summary page, verify that You have successfully completed the Create Cluster Wizard, clickView Report for more details.

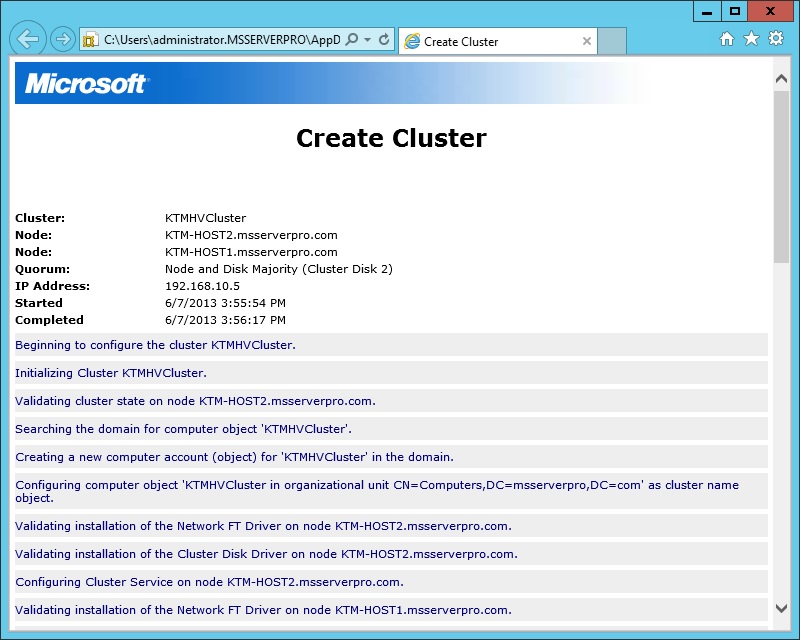
9. On the Summary page, click Finish.
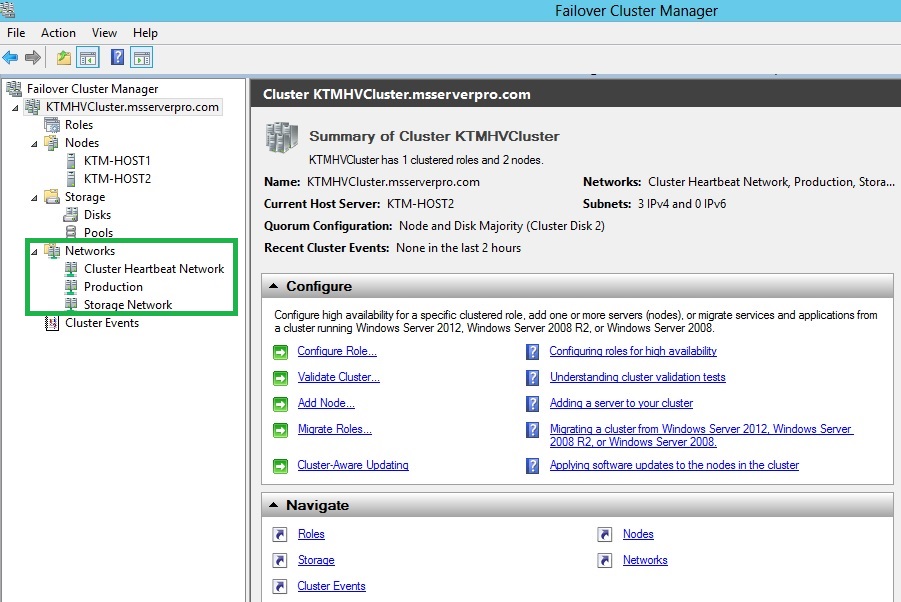
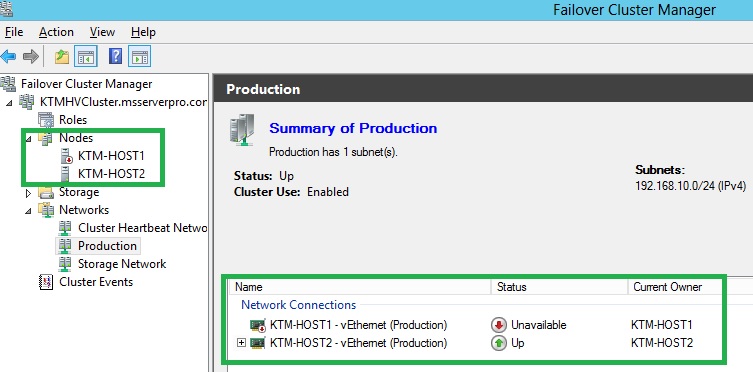
Step 9: Rename Cluster Networks:
1. Open Failover Cluster Manager, expand Networks and then rename the Cluster Networks. By default it is name as Cluster Network 1, Cluster Network 2, Cluster Network 3 and so on..


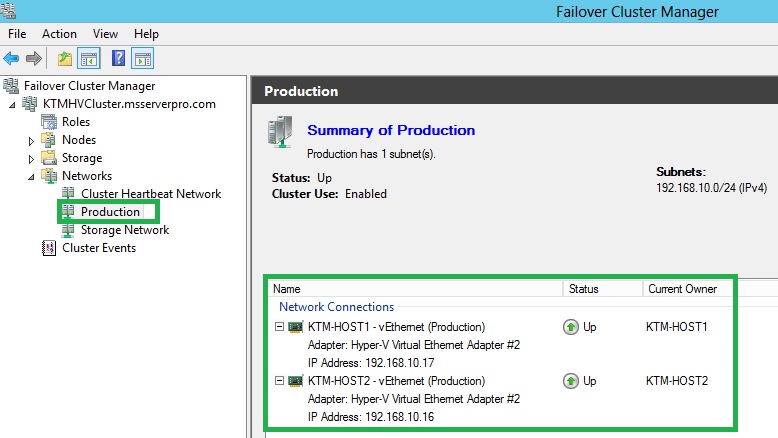

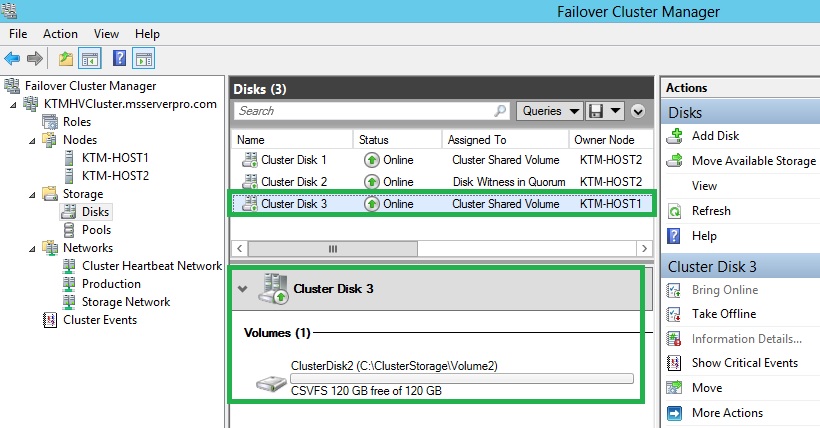
Step 10: Enabling Cluster Shared Volumes
1. Open Failover Cluster Manager.
2. Expand Storage and select Disks.
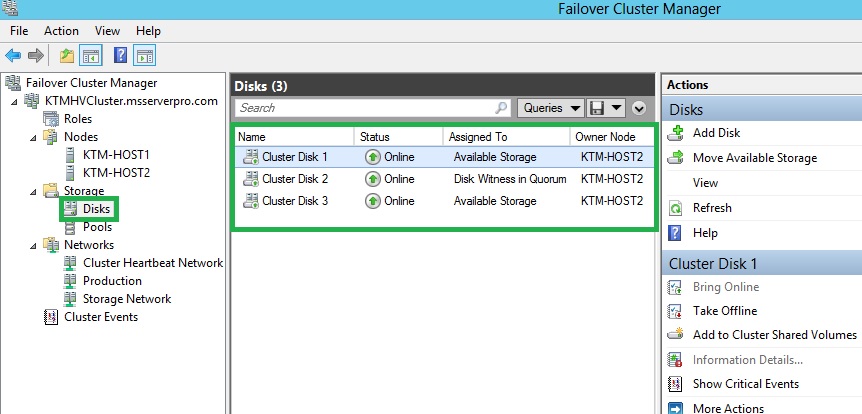
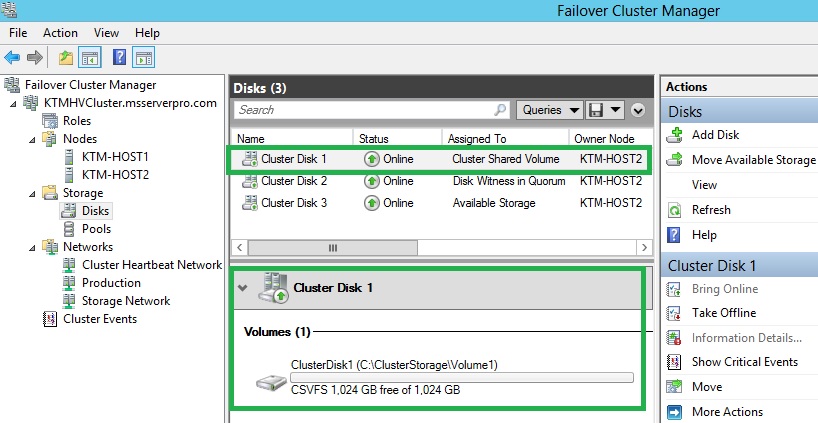
3. Right-click on Cluster Disk 1 and select Add to Cluster Shared Volumes and verify that Cluster Disk1 will be changed to Cluster Shared Volume.
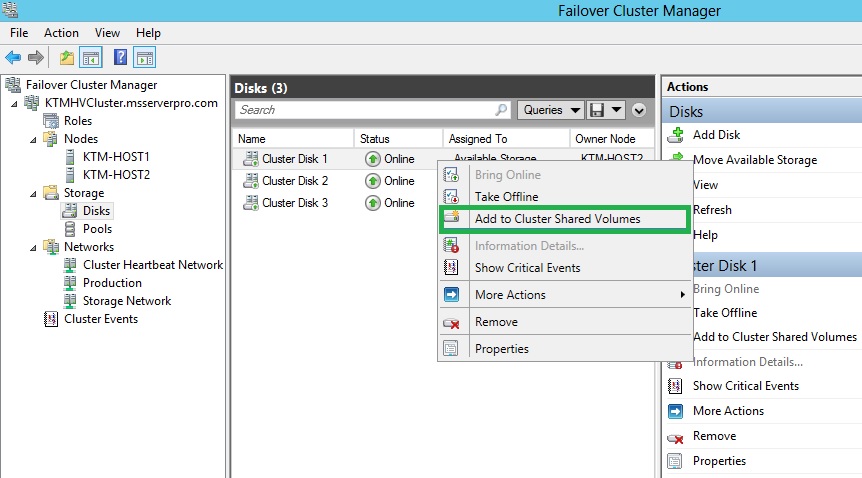
4. Do the same process for Cluster Disk 3.

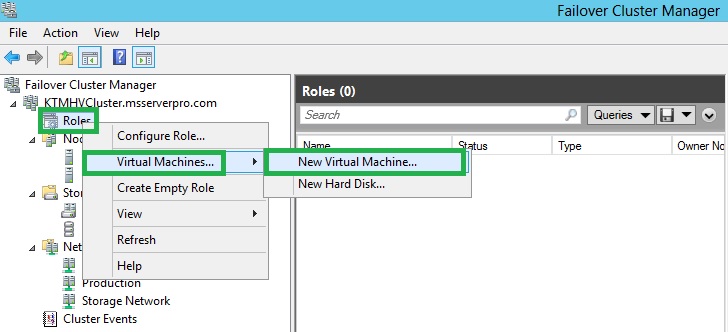
Step 11: Configuring a Highly Available Virtual Machine
1. Open Failover Cluster Manager.
2. In the Failover Cluster Manager, Right-click on Roles, select Virtual Machines and then click New Virtual Machine…
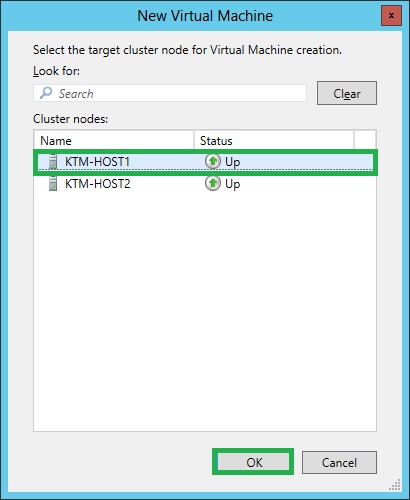
3. On the New Virtual Machine wizard page, select Cluster Hyper-V nodes and click OK.
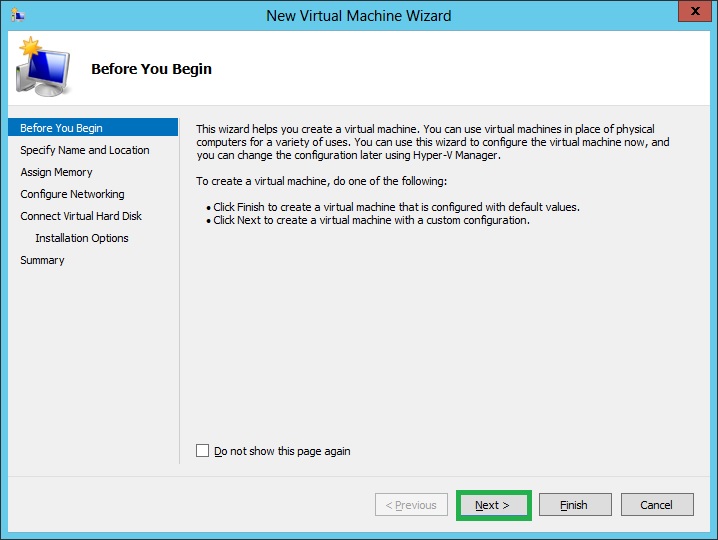
4. On the Before You Begin page, click Next.
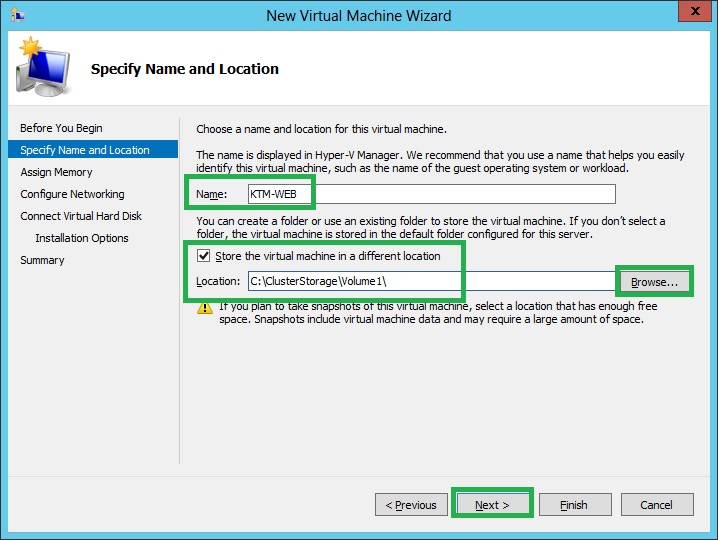
5. On the Specify Name and Location page, type KTM-WEB for the Name: and then click Store the virtual machine in a different location and then click Browse. And select C:\ClusterStorage\Volume1 and clickNext.
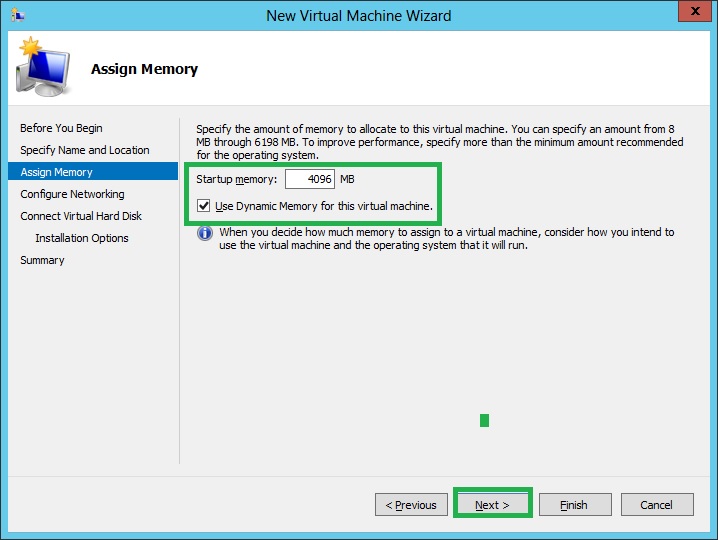
6. On the Assign Memory page, type 4096 and select Use Dynamic Memory for this virtual machine and click Next.
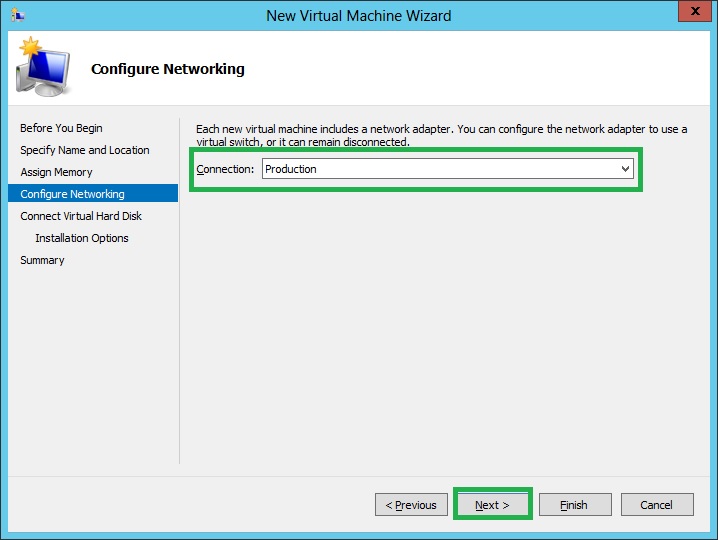
7. On the Configure Networking page, select Production in Connection drop-down menu and click Next.
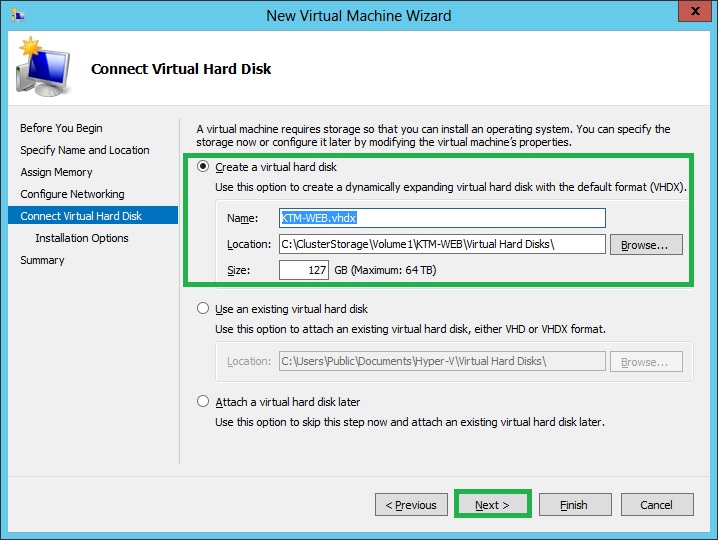
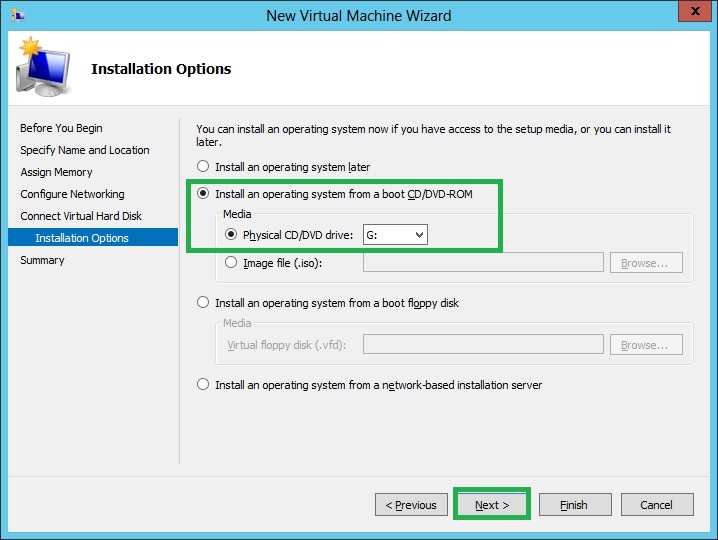
8. On the Connect Virtual Hard Disk page, click Create a virtual hard disk and then click Next.
9. On the Installation Options page, click Install operating system from a boot CD/DVD-ROM, selectPhysical CD/DVD drive:G. Here G is the drive letter of DVD Drive and Click Next.
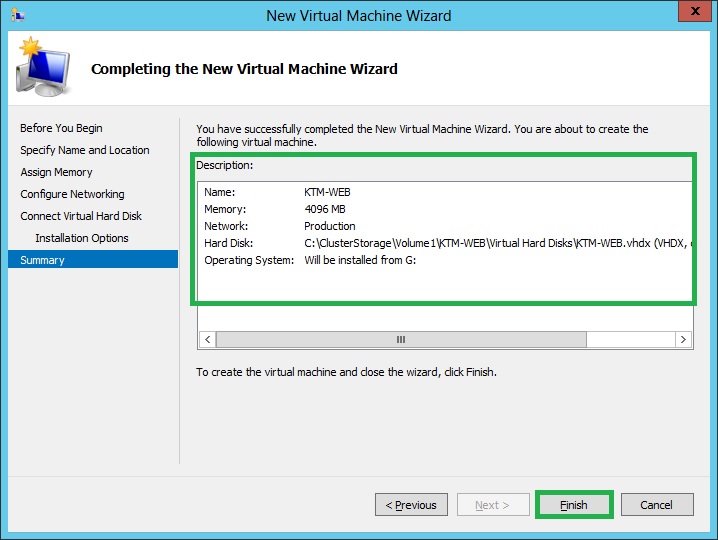
10. On the Completing the New Virtual Machine Wizard page, verify description and click Finish.

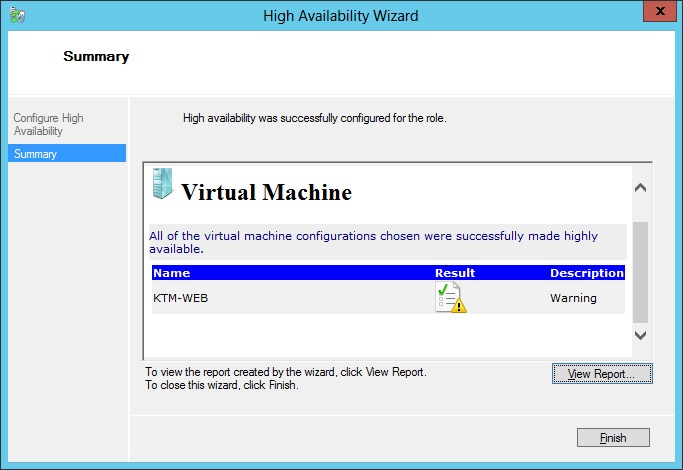
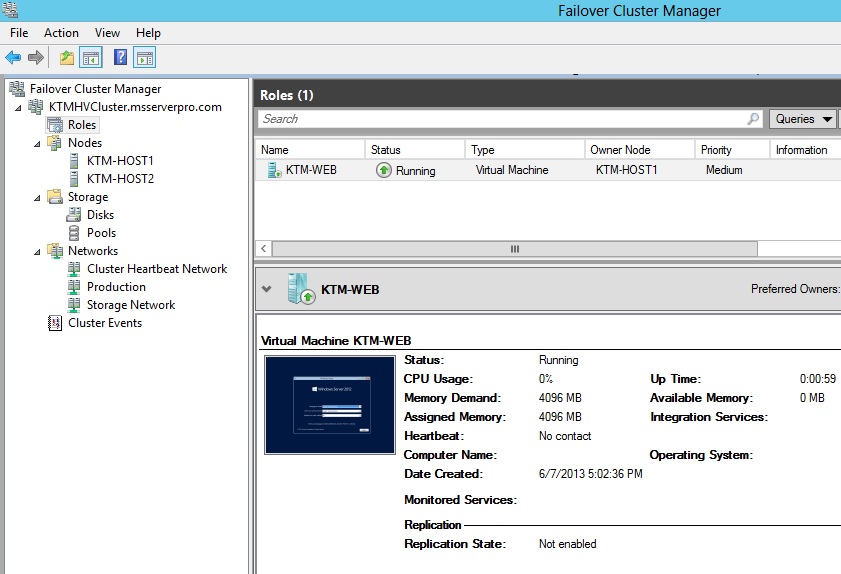
11. On the Summary page of High Availability Wizard page, click Finish.
12. Right-Click On KTM-WEB virtual machine and then click Start.
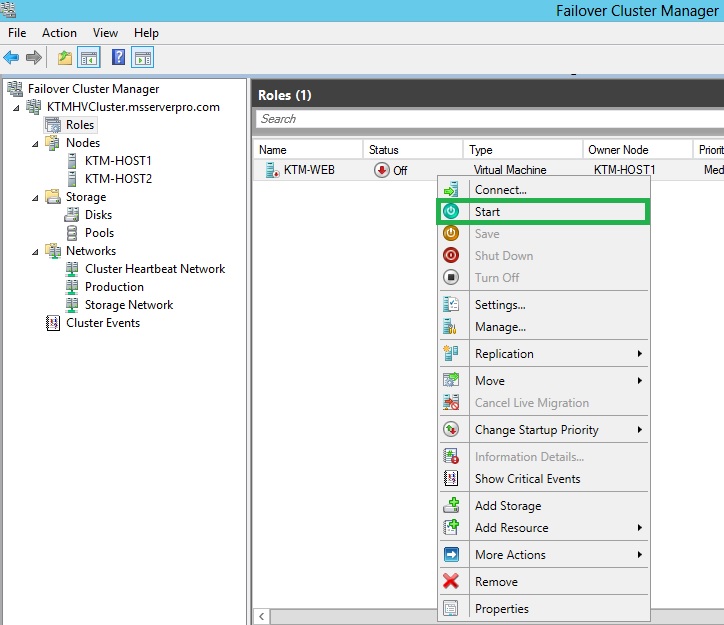
13. Verify that the virtual machine successfully Running. And follows the Setup Instruction…
Step 12: Making an Existing VM Highly Available
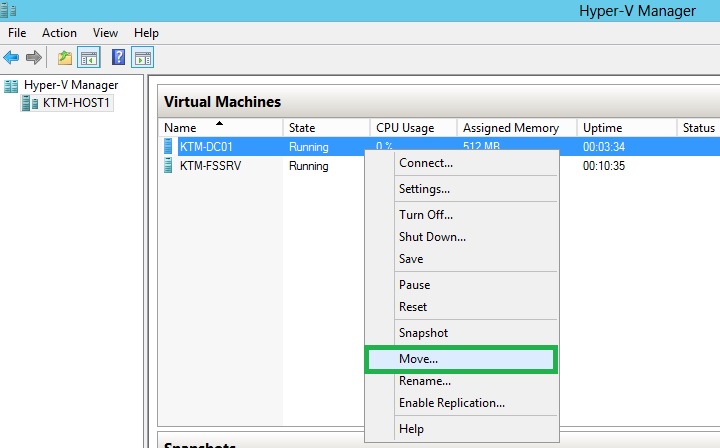
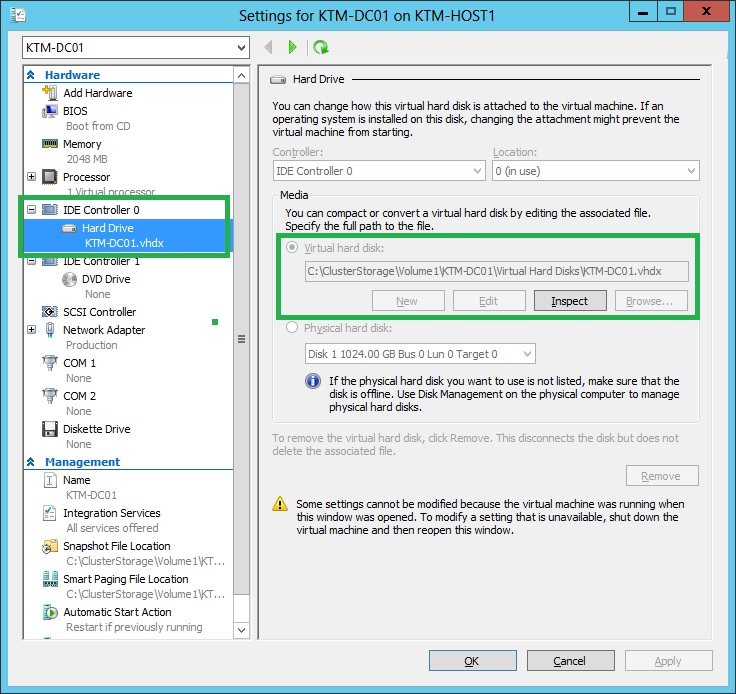
1. On KTM-HOST1, Open Hyper-V Manager, Right-click on the virtual machine, KTM-DC01, and chooseMove.
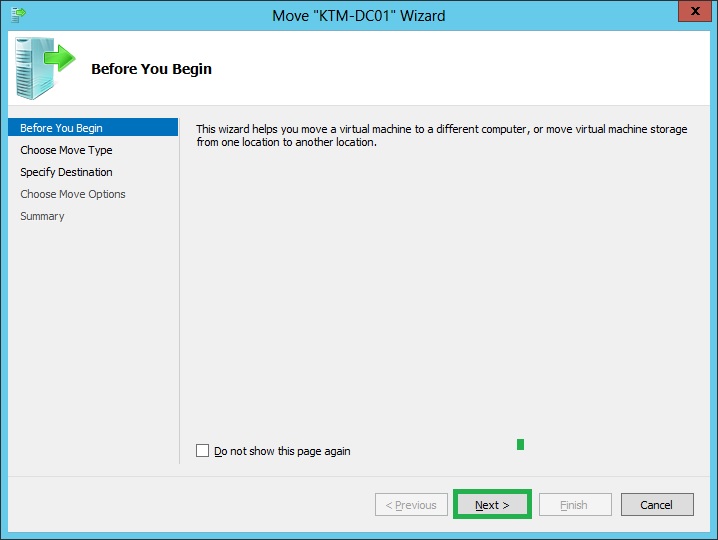
2. On the Before You Begin page, click Next.
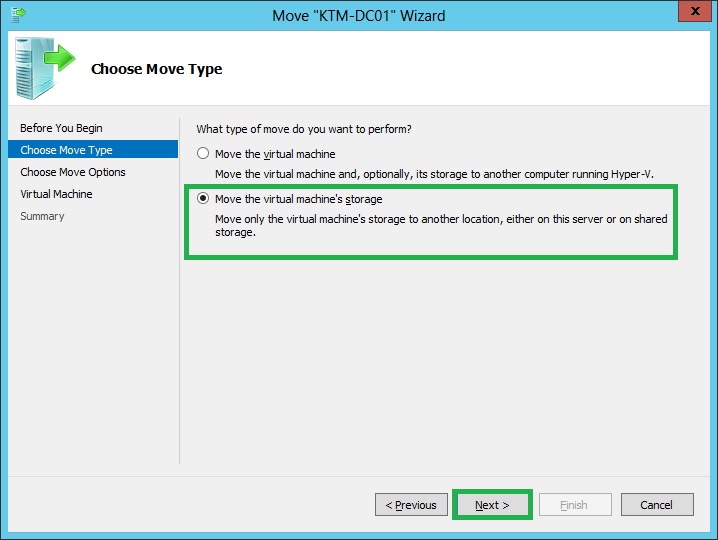
3. On the Choose Move Type page, select Move the virtual machine’s storage, and click Next.
4. On the Choose Options for Moving Storage page, select Move all of the virtual machine’s data to a single location and then click Next.

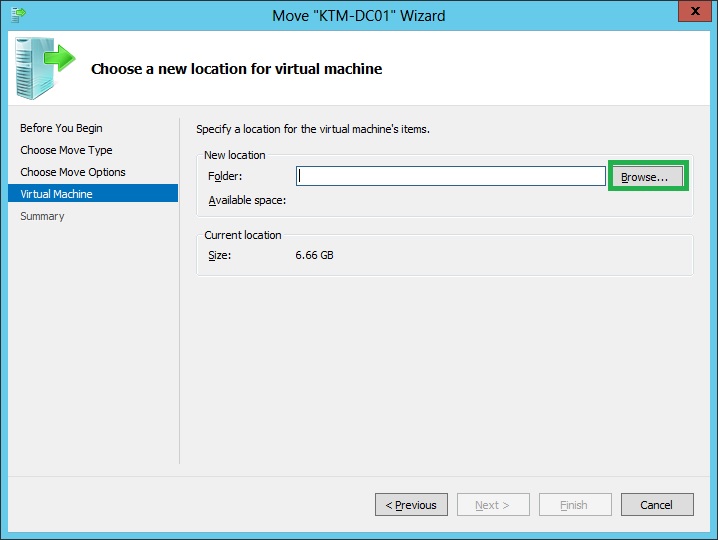
5. On the Choose a new location for virtual machine page, click Browse. Open Windows Explorer and navigate to C:\ClusterStorage\Volume1\KTM-DC01 in New location Folder and click Next.

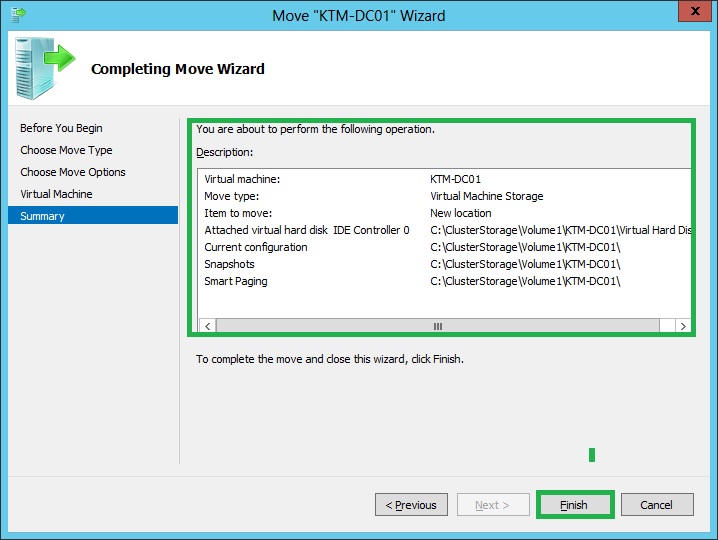
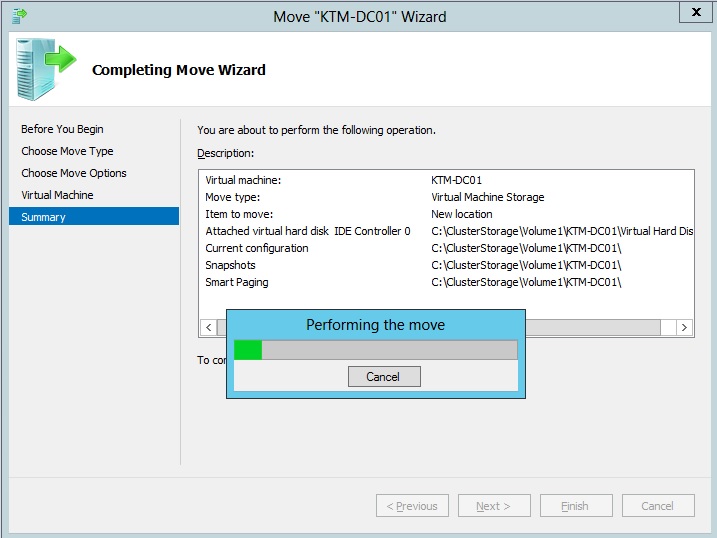
6. On Completing Move Wizard page, review the description and Click Finish.
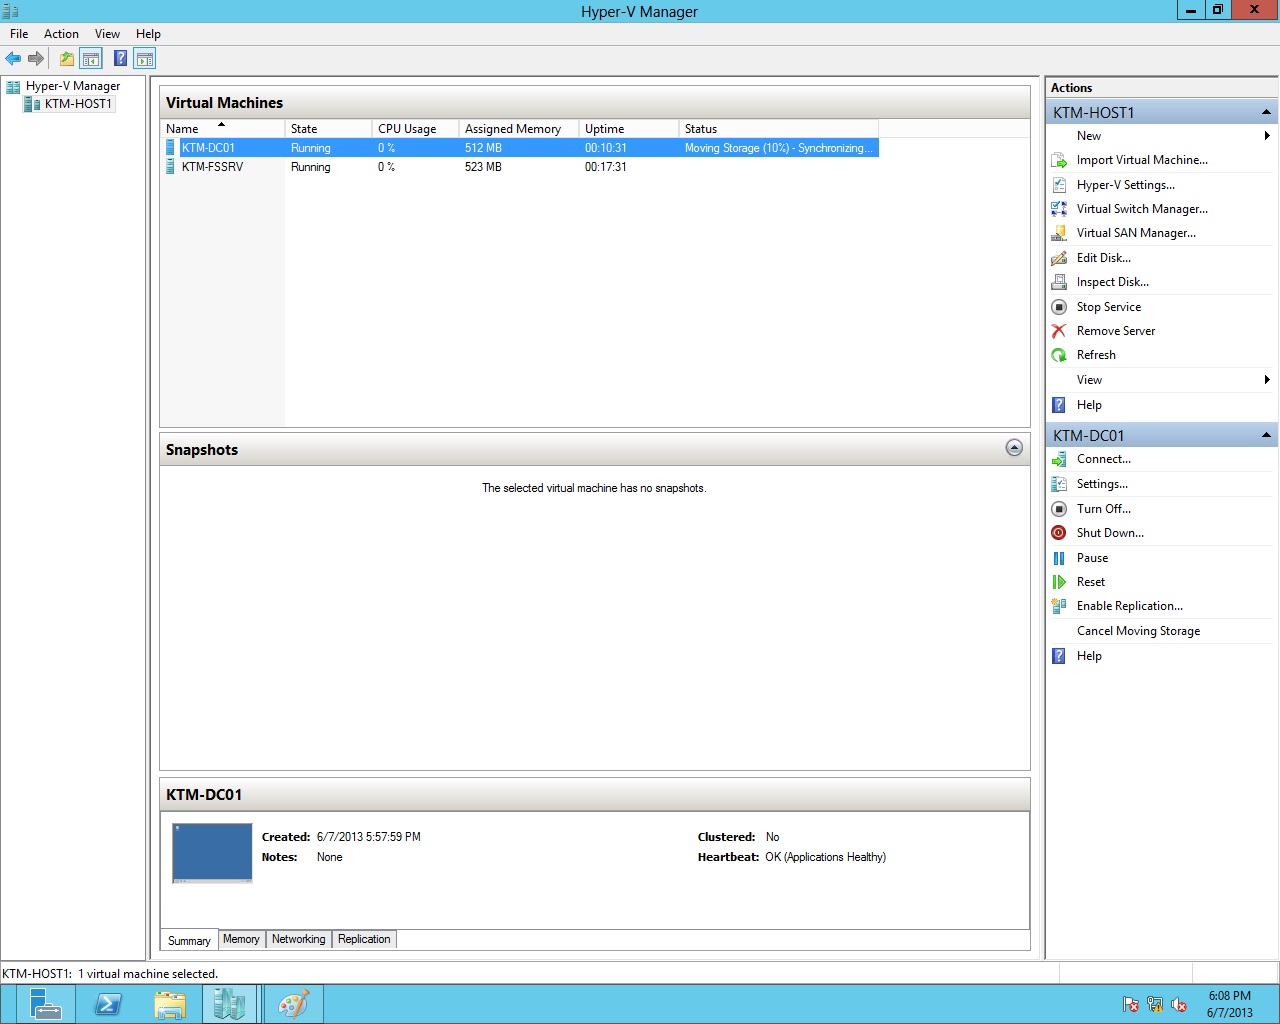
7. Verify the storage location to ClusterStorage Volume.
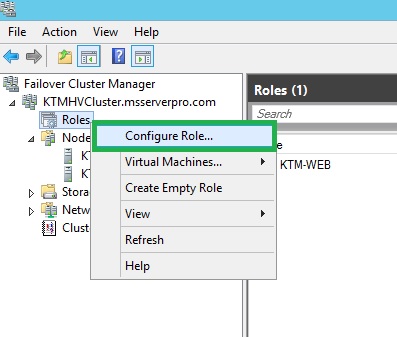
8. Open Failover Cluster Manager console, Right-click on Roles and select Configure Role..
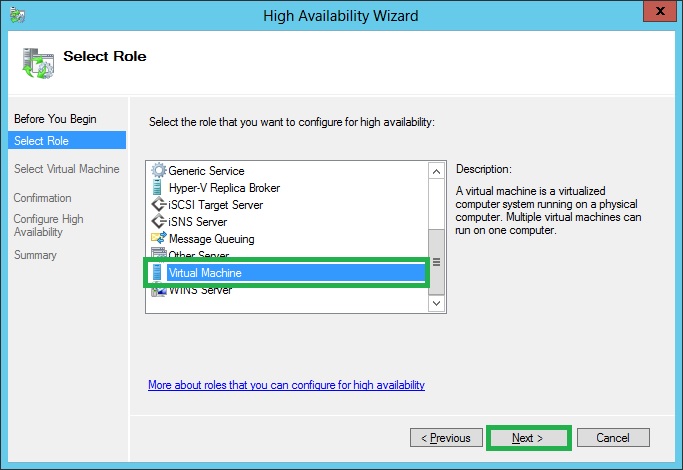
9. On the Before You Begin page, click Next.

10. On the Select Role page, select Virtual Machine and click Next.
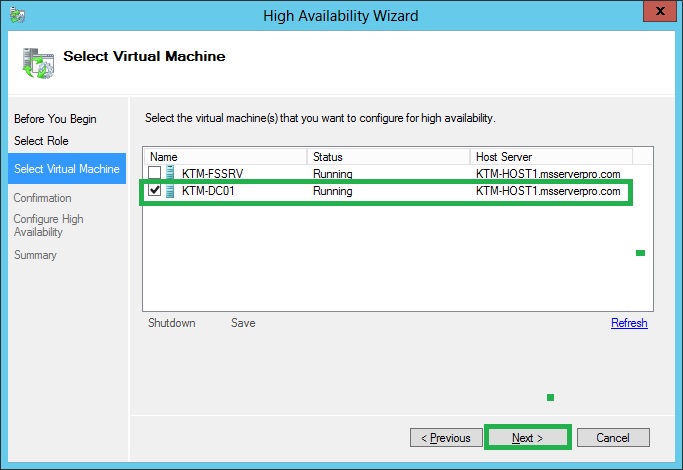
11. On the Select Virtual Machine page, select the virtual machine, KTM-DC01, that you want to configure for High availability and click Next.
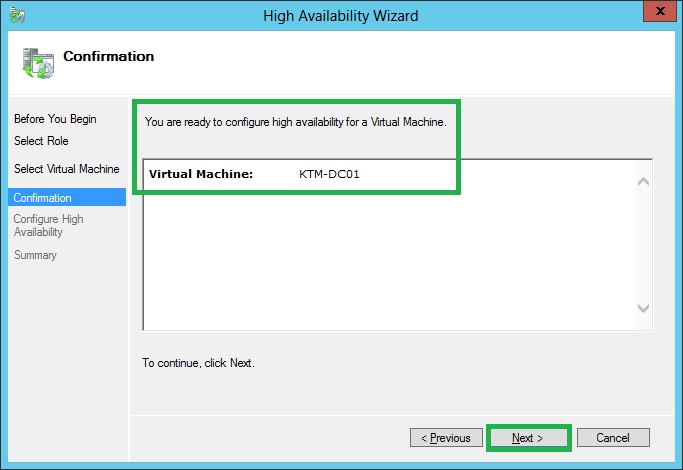
12. On the Confirmation page, verify the virtual machine and click Next.
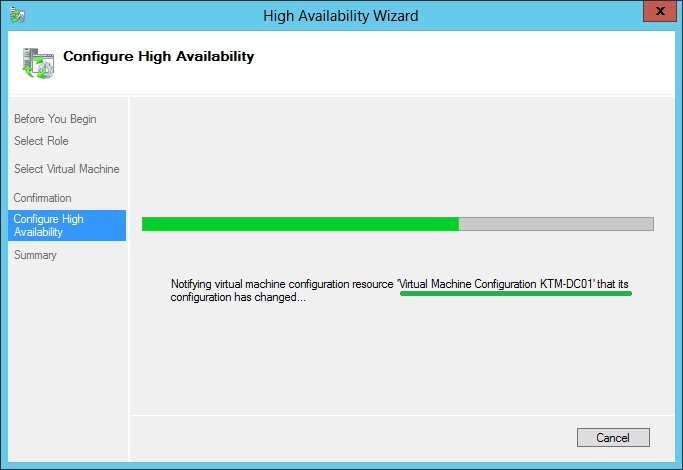
13. On the Configure High Availability page, virtual machine configuration has changed…
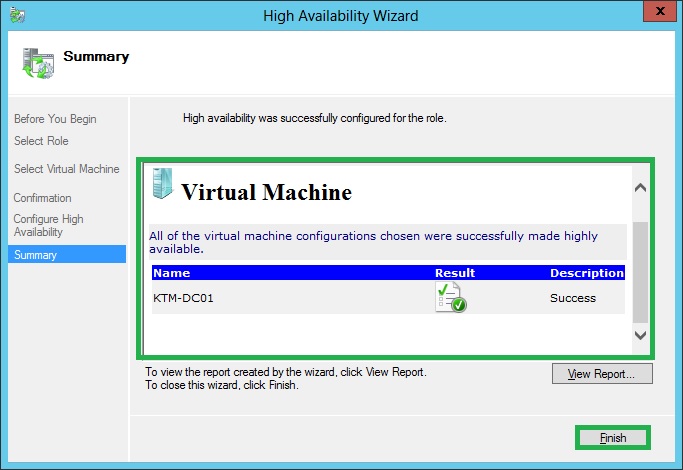
14. On the Summary page, verify the success result and click Finish.
Step 13: Testing the Failover Cluster
There are three ways to see failover in action on a Hyper-V failover cluster. The first is to perform the Live Migration, which is called Planned Failover. The second is to simulate a failure and is called an Unplanned Failover. The third is to experience an actual failure. That said, I would not recommend you that power cables be unplugged during test of the cluster. This might be the actual scenario when the power fails but that can also be tested by physically shutting down one of the cluster nodes gracefully.
Simulation a Planned Failover
To test a planned failover, we can move the HA virtual machine from one node to another node. Here KTM-HOST1 to KTM-HOST2 or reverse. Here, we are using Live Migration option for Test a Planned Failover.
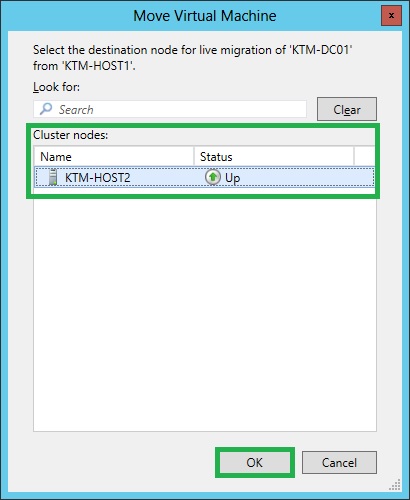
1. To perform the Live Migration, in Failover Cluster Manager, Expand Nodes, Right-Click on the HA VM, click Move and select to Live Migration and click Select Node..
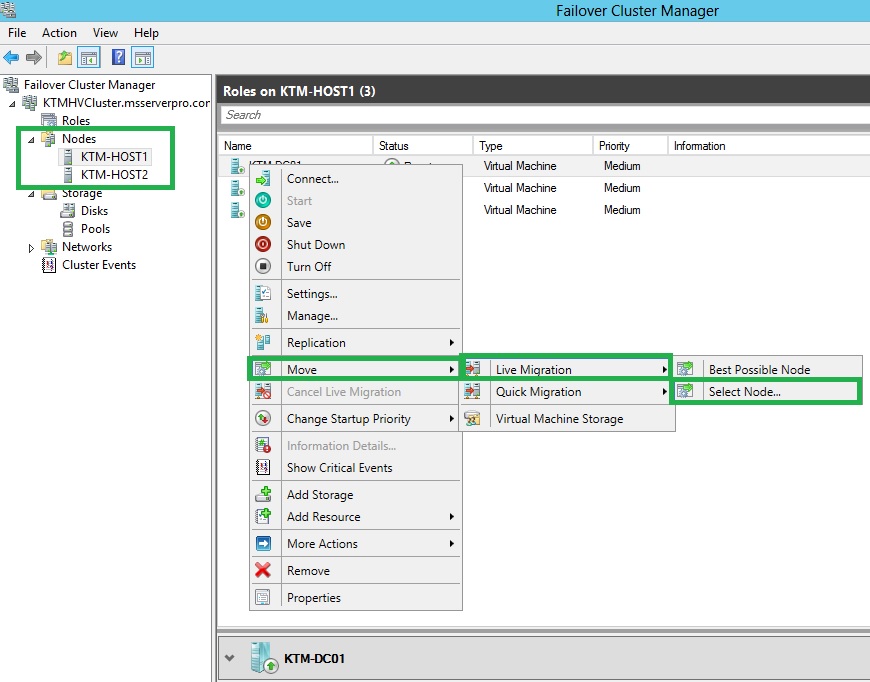
2. In the Move Virtual Machine dialog box, select the other Cluster nodes and then click OK.
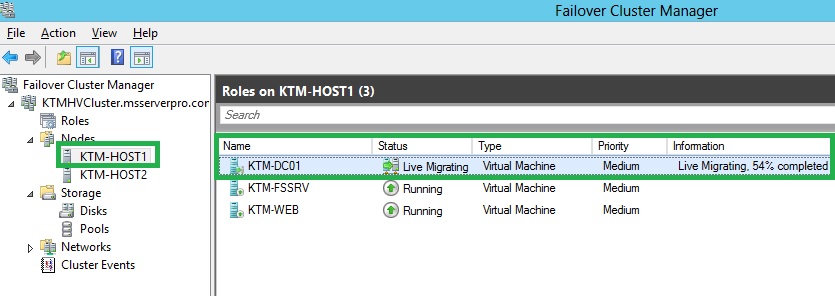
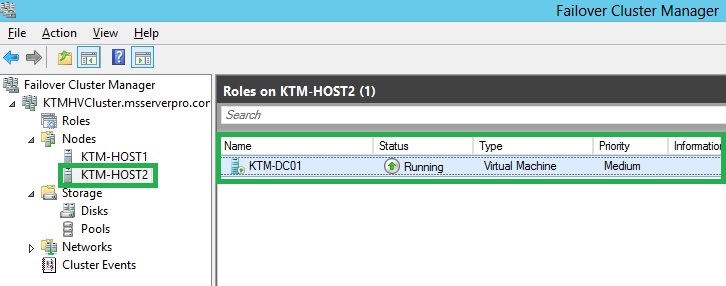
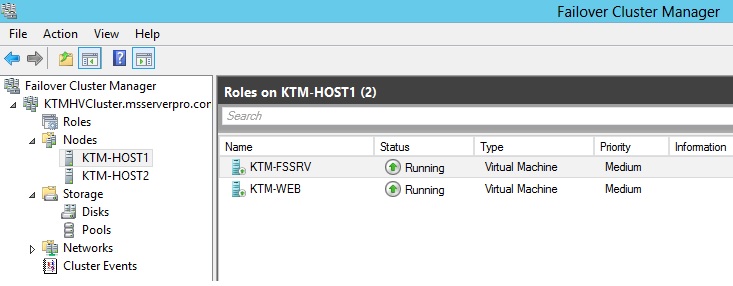
3. Live Migration process started and keep track of the migration status in Failover Cluster Manager.
Simulating an Unplanned Failover
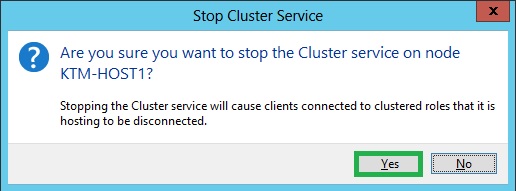
To test an unplanned failover of the HA virtual machine, we can stop the Cluster service on the node that owns the HA virtual machines.
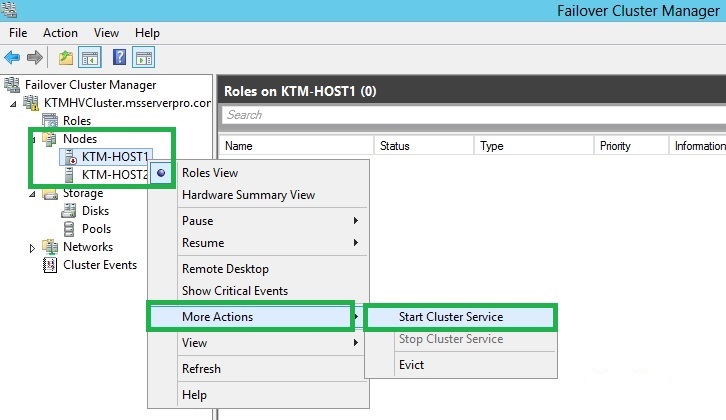
1. In the Failover Cluster Manager console, expand Nodes, Right-click on one of the node to test Unplanned Failover, point to More Actions and then click Stop Cluster Service.

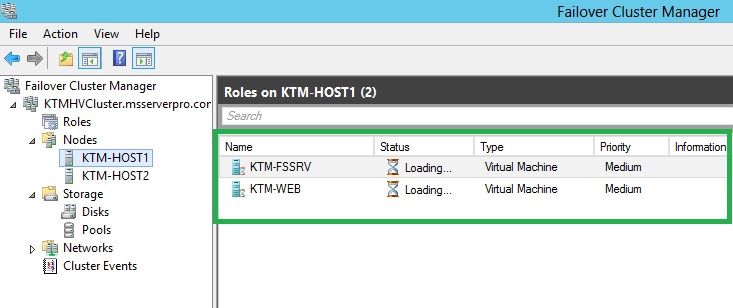
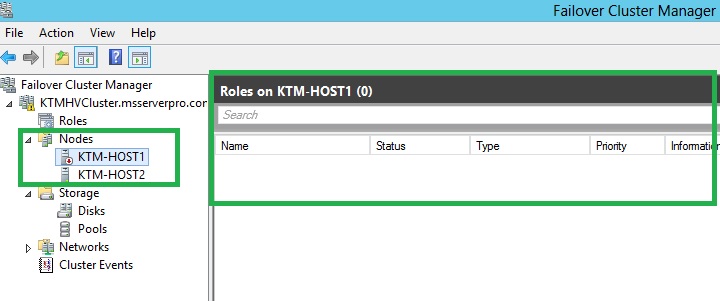
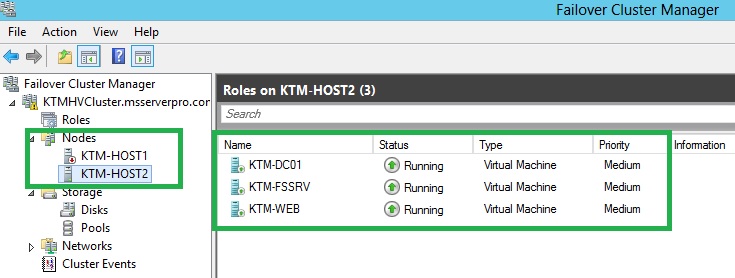
2. Verify that the virtual machine moves to the other mode. This might take a short delay while this process.
3. After finished the testing of an unplanned failover, start the Start Cluster Service of KTM-HOST1..
Summary:
Failover clustering with Hyper-V is essential to high availability and resilient systems that are at the heart of your business. Windows Server 2012 Hyper-V provides interesting and friendly options for adding Hyper-V high availability and virtual machine mobility to your virtual machines. This exercise will help IT professionals get their experience for the failover scenario that they may encounter during their career.
This comment has been removed by the author.
ReplyDeleteNice blog.. Must say very informative about A failover cluster is a group of two or more computers working together to increase the availability of a clustered services or applications With Good Pictures , We really like it. If you want to know about server hosting or interested in best USA VPS Hosting you can ask us for more details and services. We help you to spread your business.
ReplyDeleteYour blog content is so amazing and different from others you always share outstanding information for us like Implementing Windows Server 2012 Hyper-V Failover Clustering Implementing Windows Server 2012 Hyper-V Failover Clustering a group of two or more computers working together to increase the availability of a clustered services or applications. To make virtual machines highly available in Hyper-V environment, we must implement failover clustering on the Hyper-V host servers. .If you want to know about server hosting or interested in best Italy VPS Hosting you can ask us for more details and services.
ReplyDelete